TeleCMI with Clinicea for next-gen clinic management

Now reach out to your patients from within Clinicea in 1-Click. Appointment follow ups, Confirmation reminders, no-show quick checks, creating awareness on new promotions, all the common tasks are now at your fingertips. All this and more comes thanks to the deep integration of TeleCMI telephony services with Clinicea's clinic management platform. Offered through the seamless CallBox module in Clinicea. Take a demo to see how your clinic can literally go cutting-edge.
With the TeleCMI integration, you can:
Get pop-up notifications with client details for incoming calls.
Embed option to call clients, from within the Scheduler, or EMR or Billing.
Handle incoming calls in context of ongoing packages, history of no-shows, dues etc.
Review call recordings, to ensure standardised care is being meted out.
Step 1:
Connect your Clinic to the TeleCMI Account
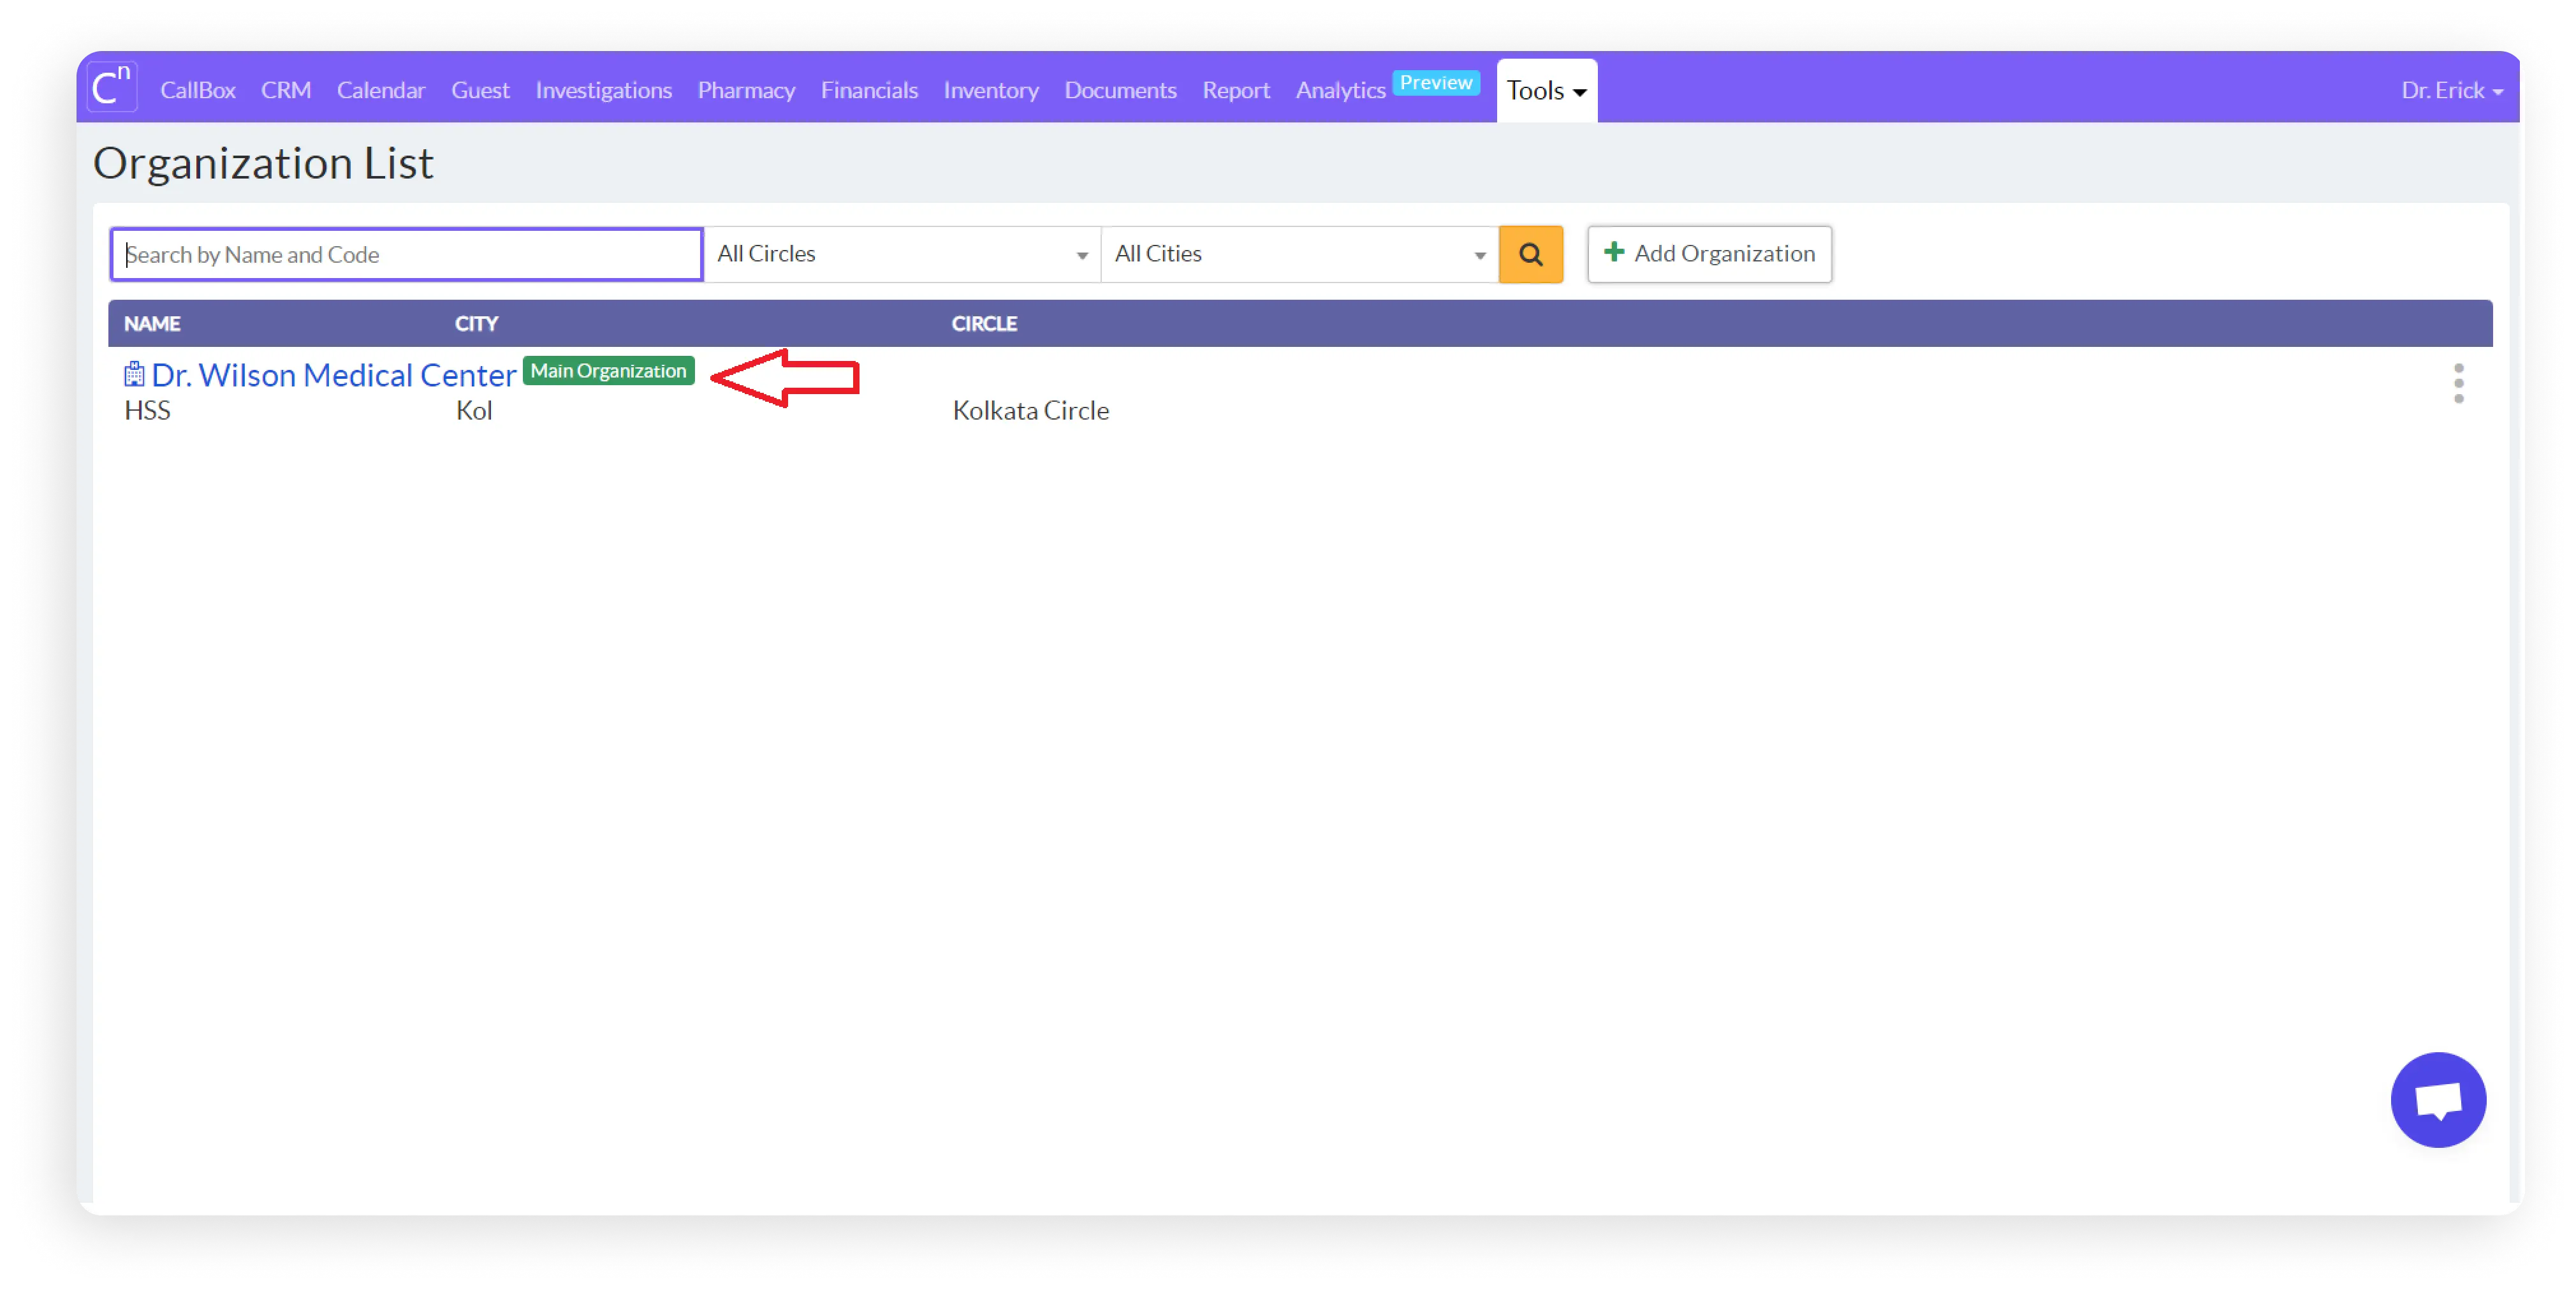
a. You need to log into Clinicea. Then you should go to Tools-> Organization -> Integration -> TeleCMI.
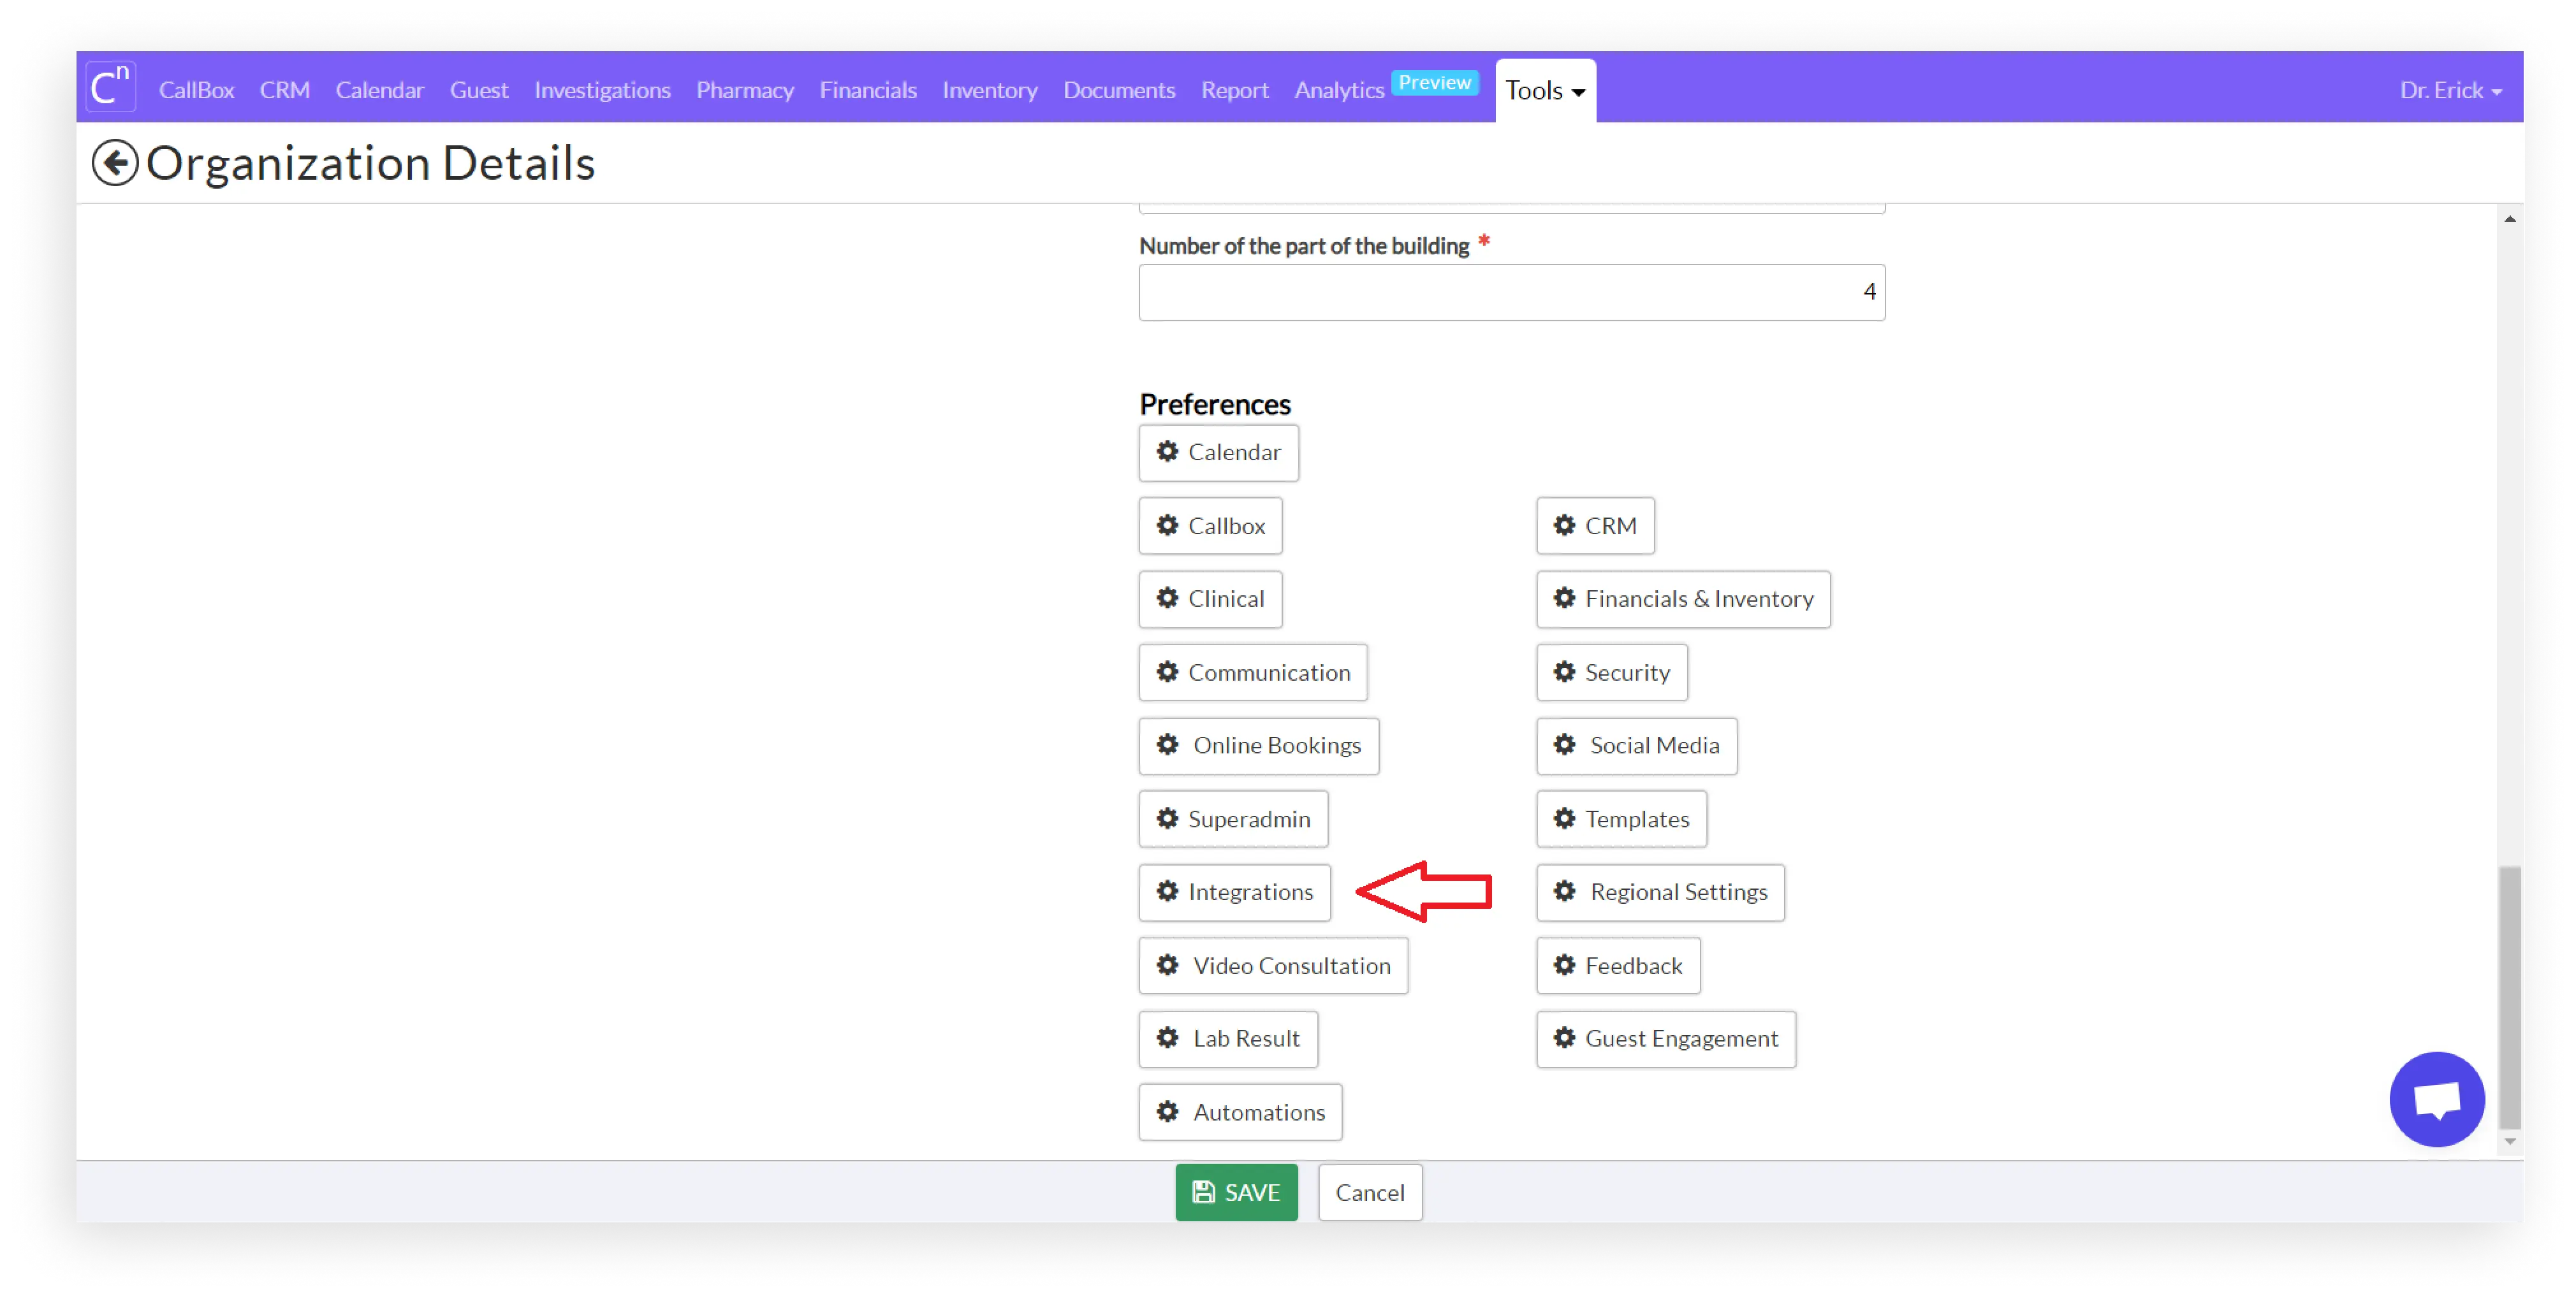
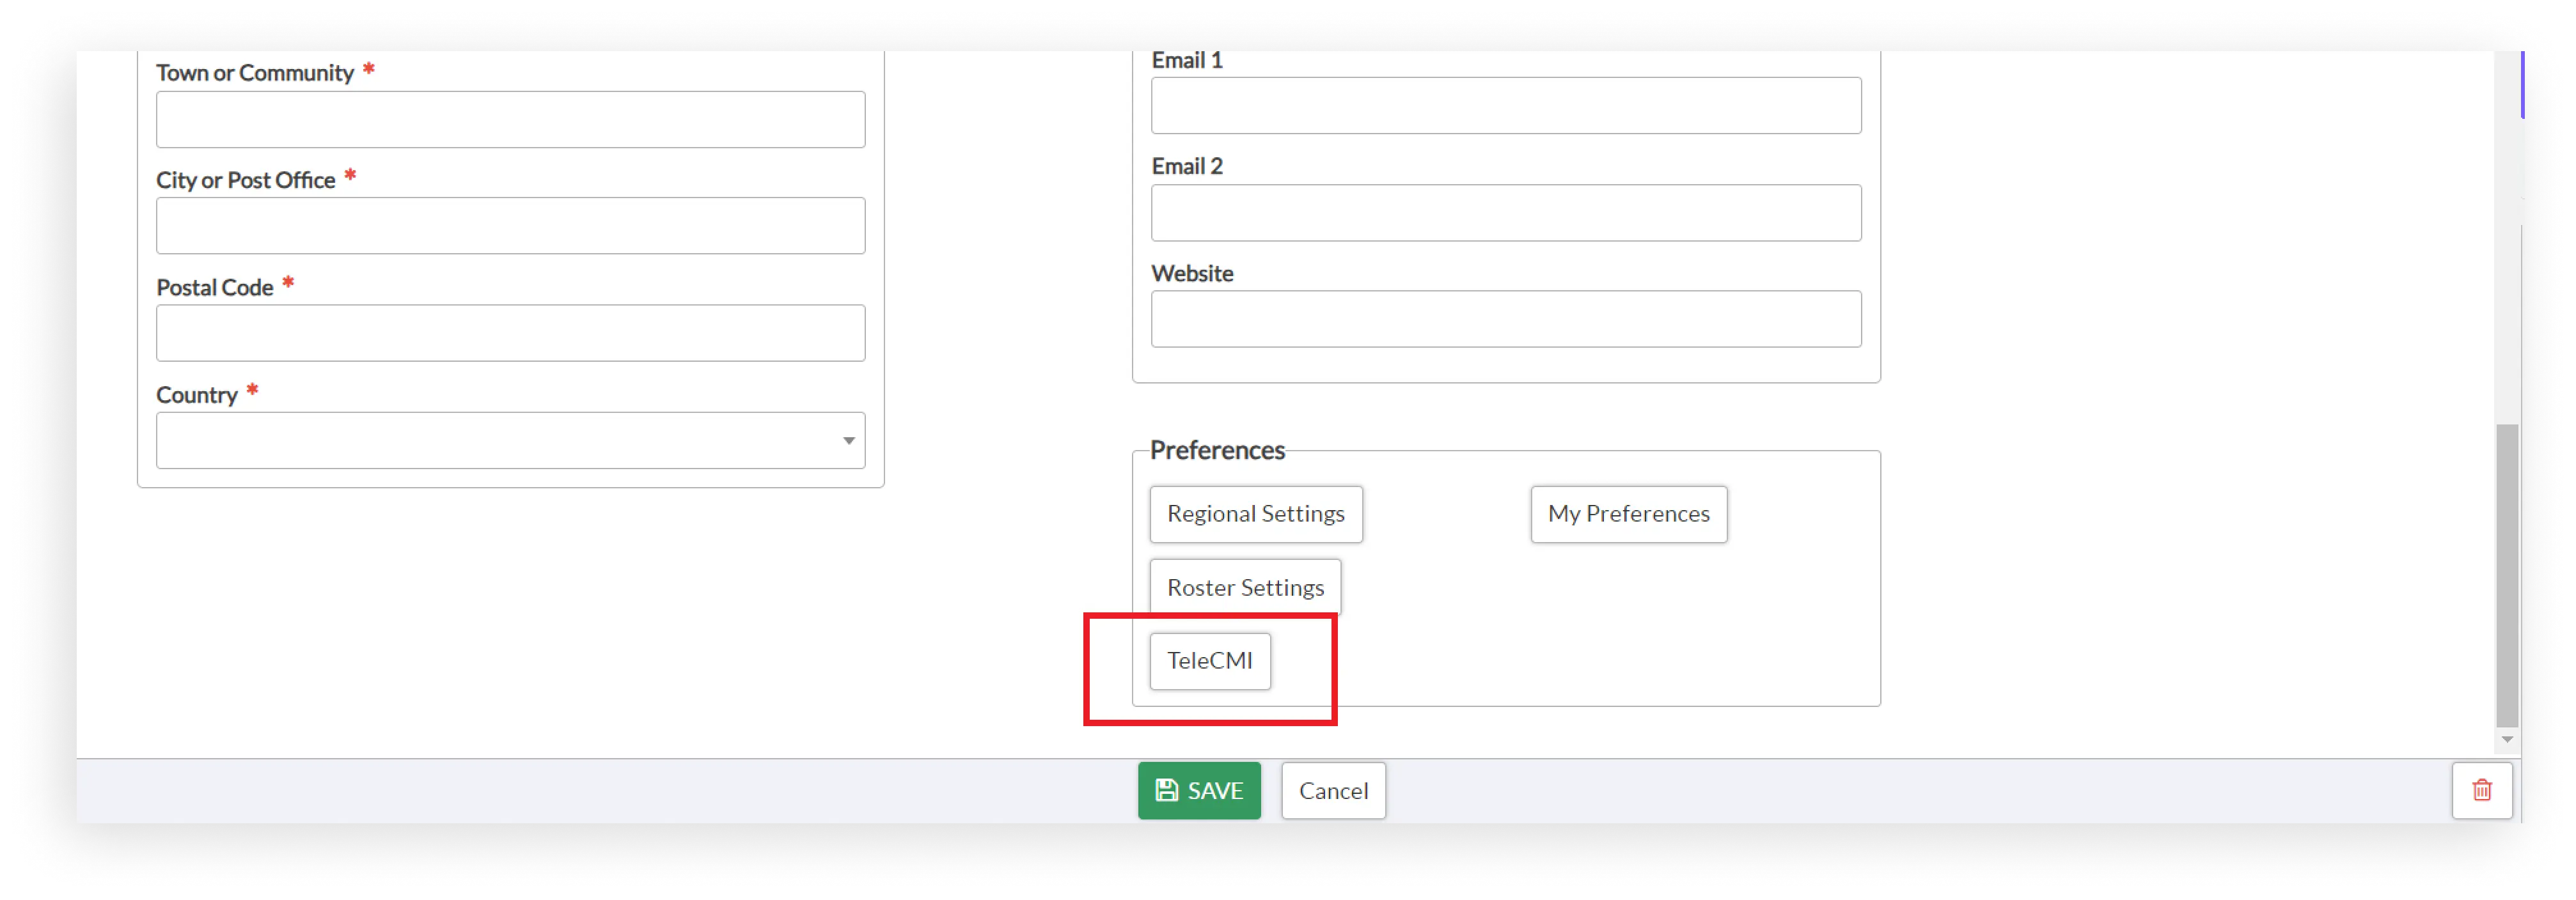
Next, you need to click on “Preferences” from the Organization Details Page.
After that, you need to select TeleCMI from the left hand side as shown above. The page for TeleCMI setup will open up.
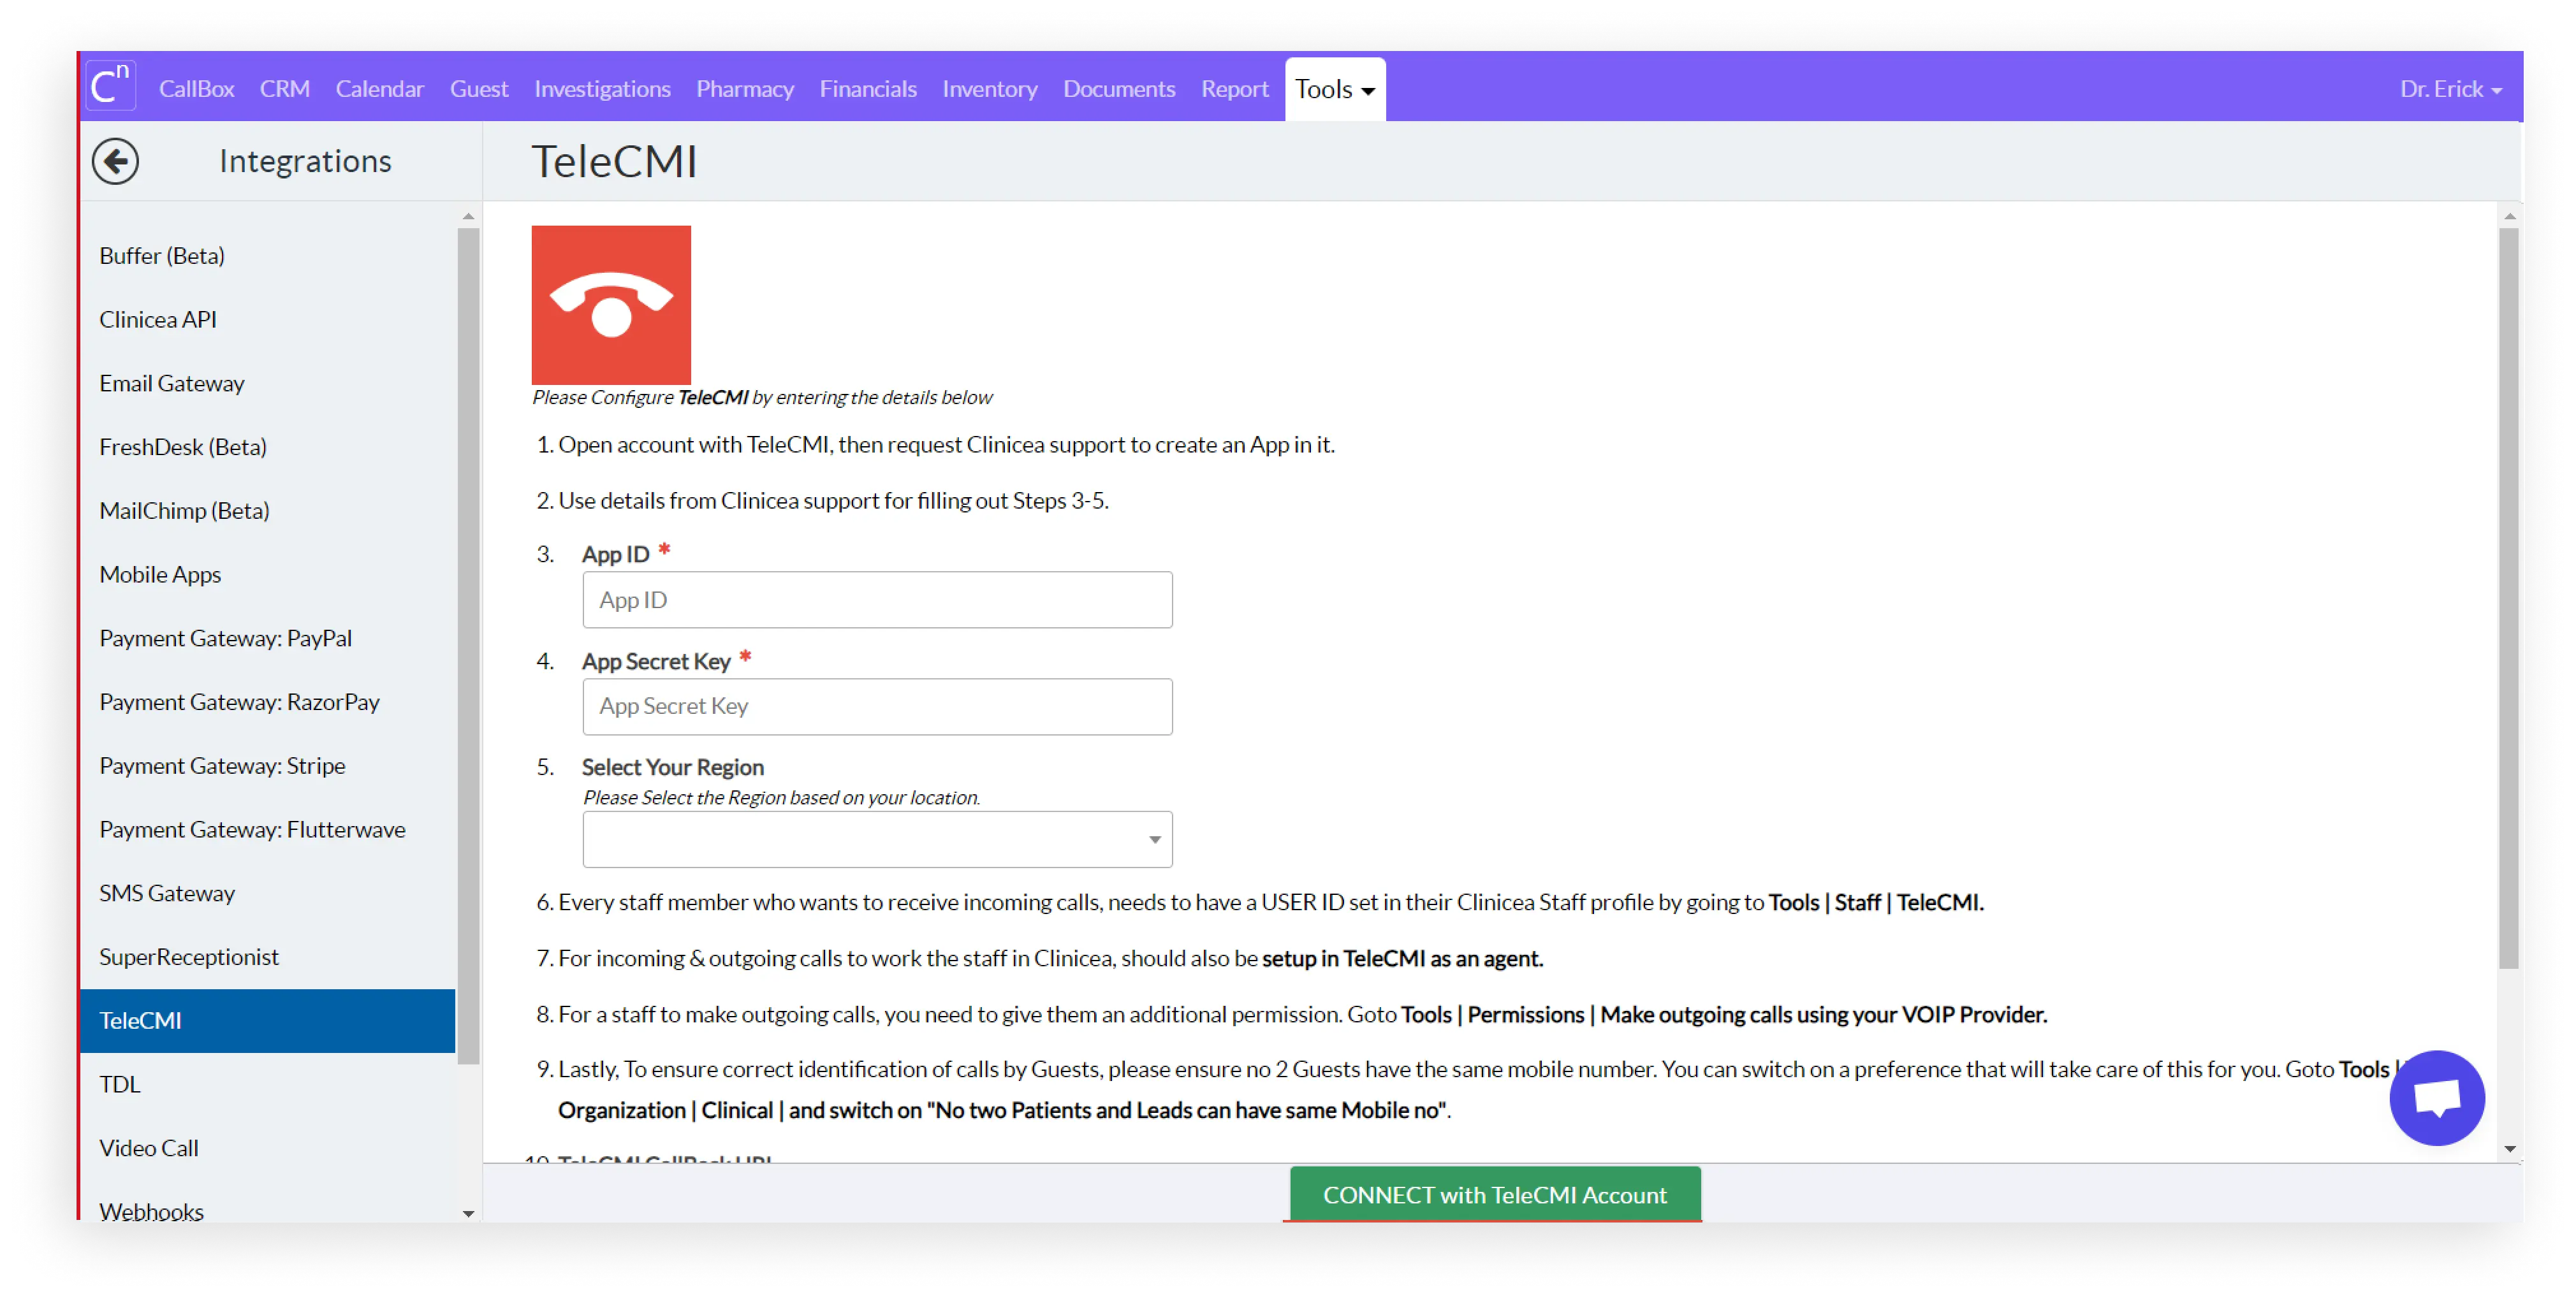
b. Please Enter the following credentials:
App ID.
App Secret.
The Geographical Region (based on your Clinic Location).
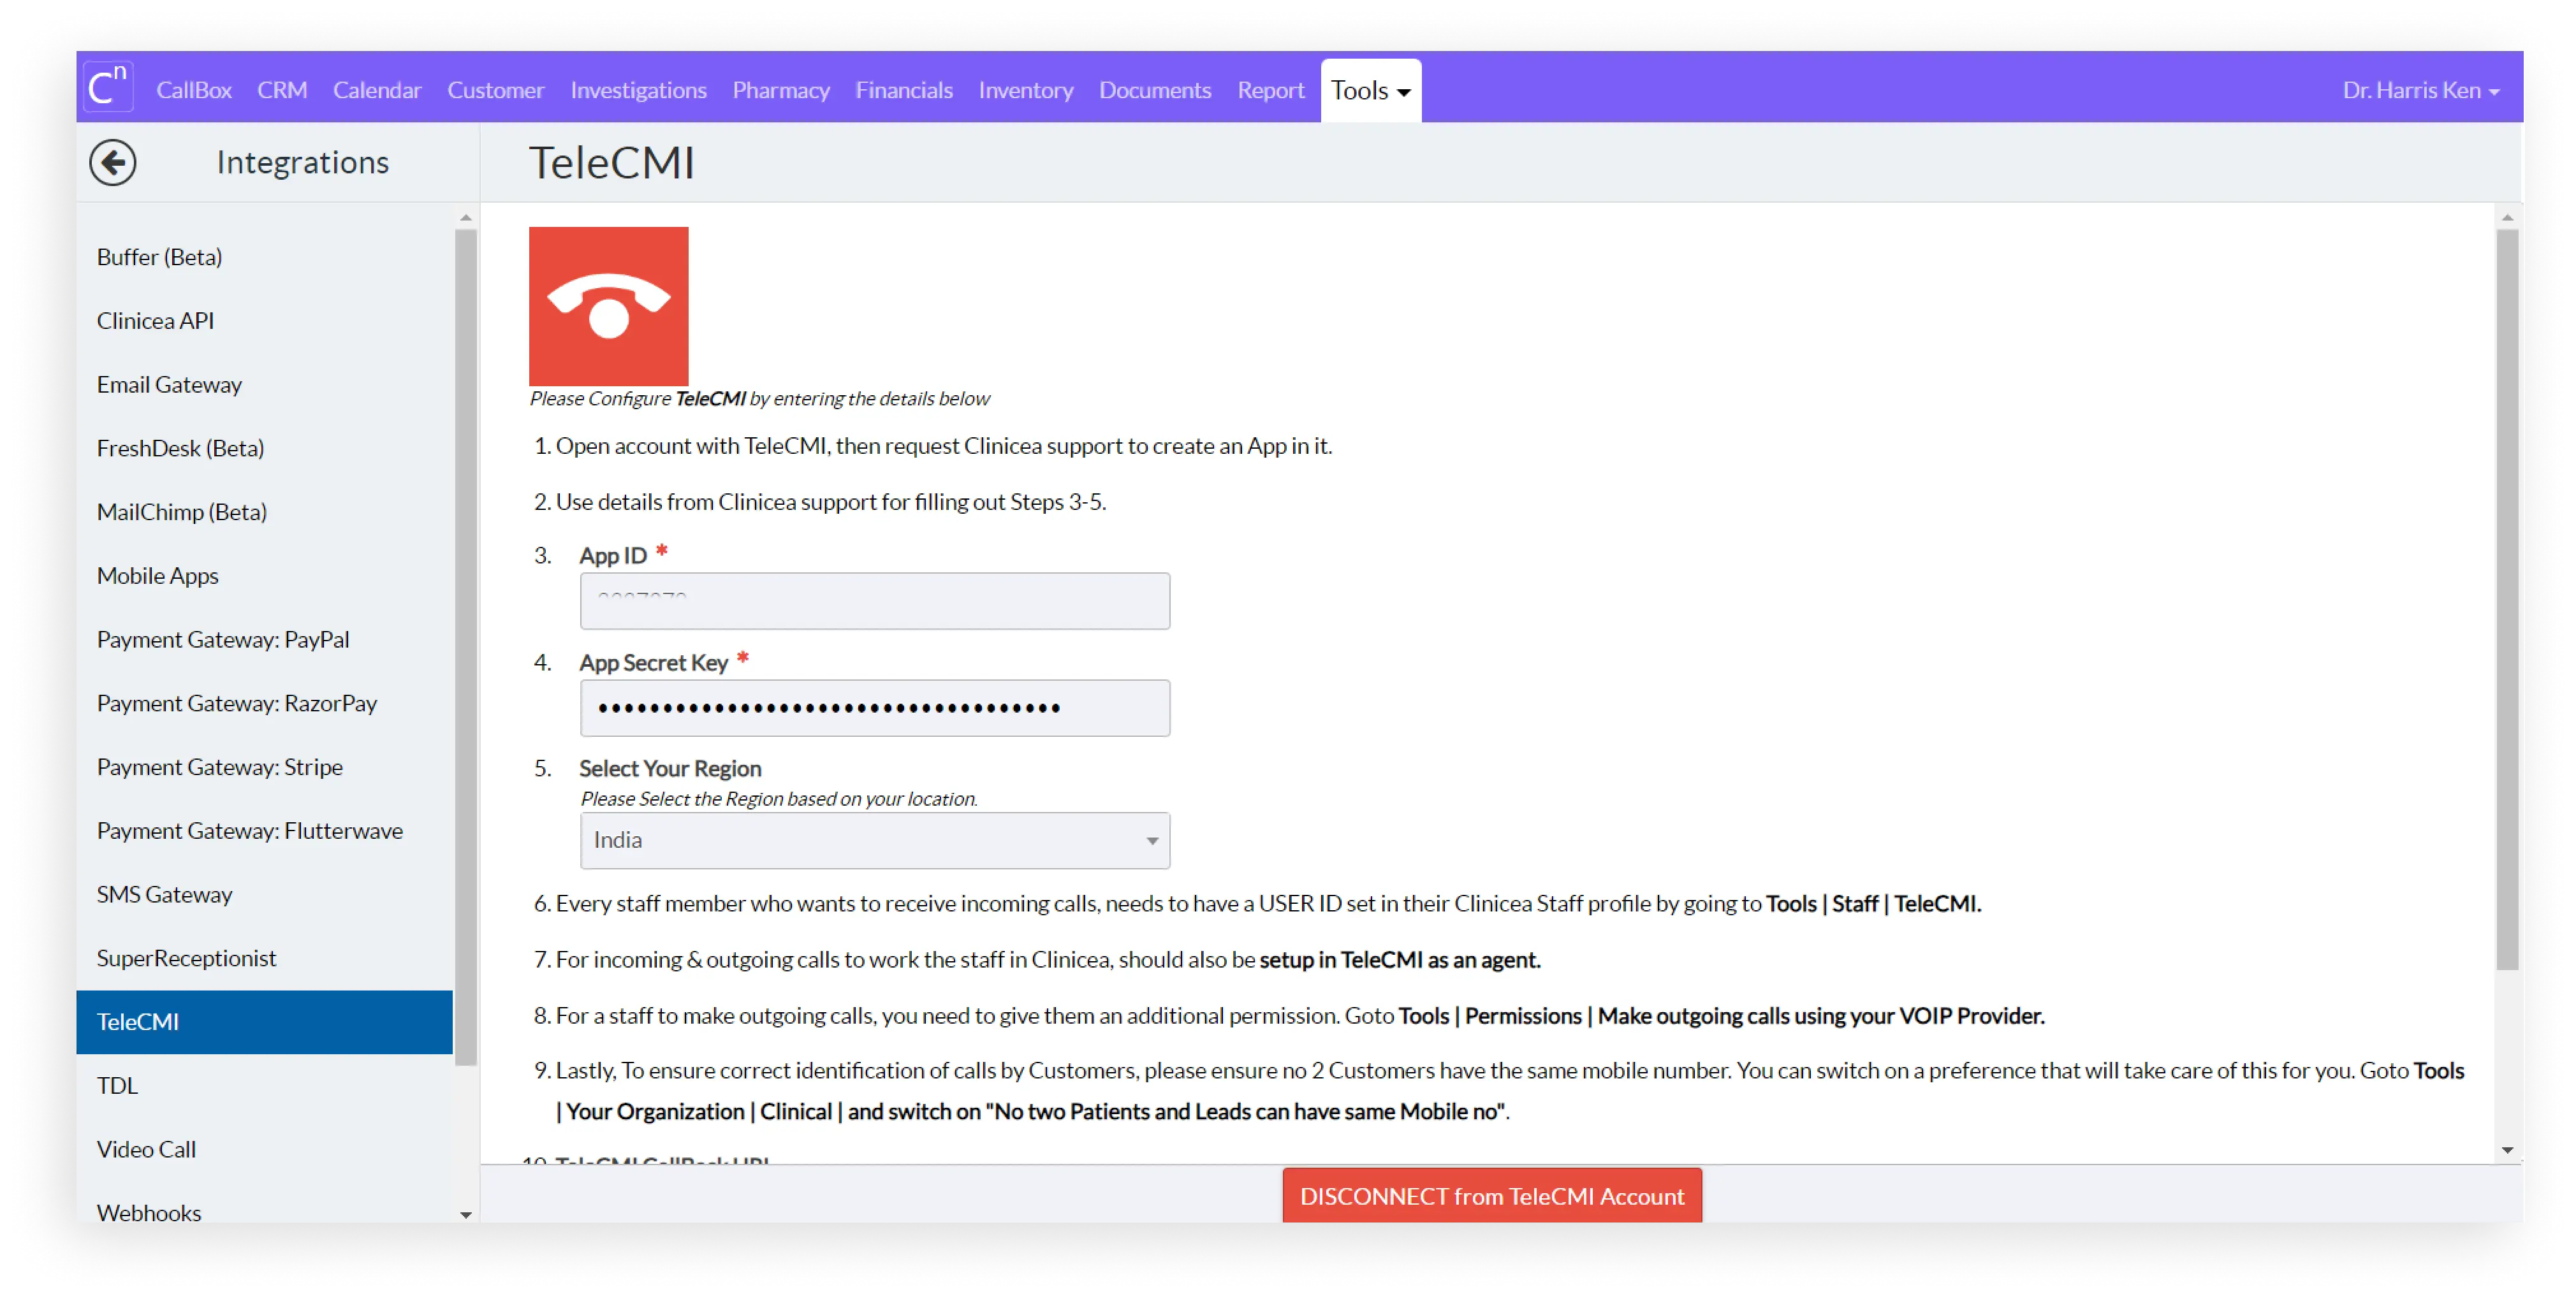
If the credentials entered above are correct, then you will be successfully connected to your TeleCMI account.
Step 2:
Configure the TeleCMI agent with your Clinicea Staff
The agents who will be handling calls need their Telecmi user ID connected with the Clinicea Staff so that they can avail of the calling facility from Clinicea Cloud’s softphone.
a. Go to Tools -> Staff -> Staff Details.
b. Click on the TeleCMI button.
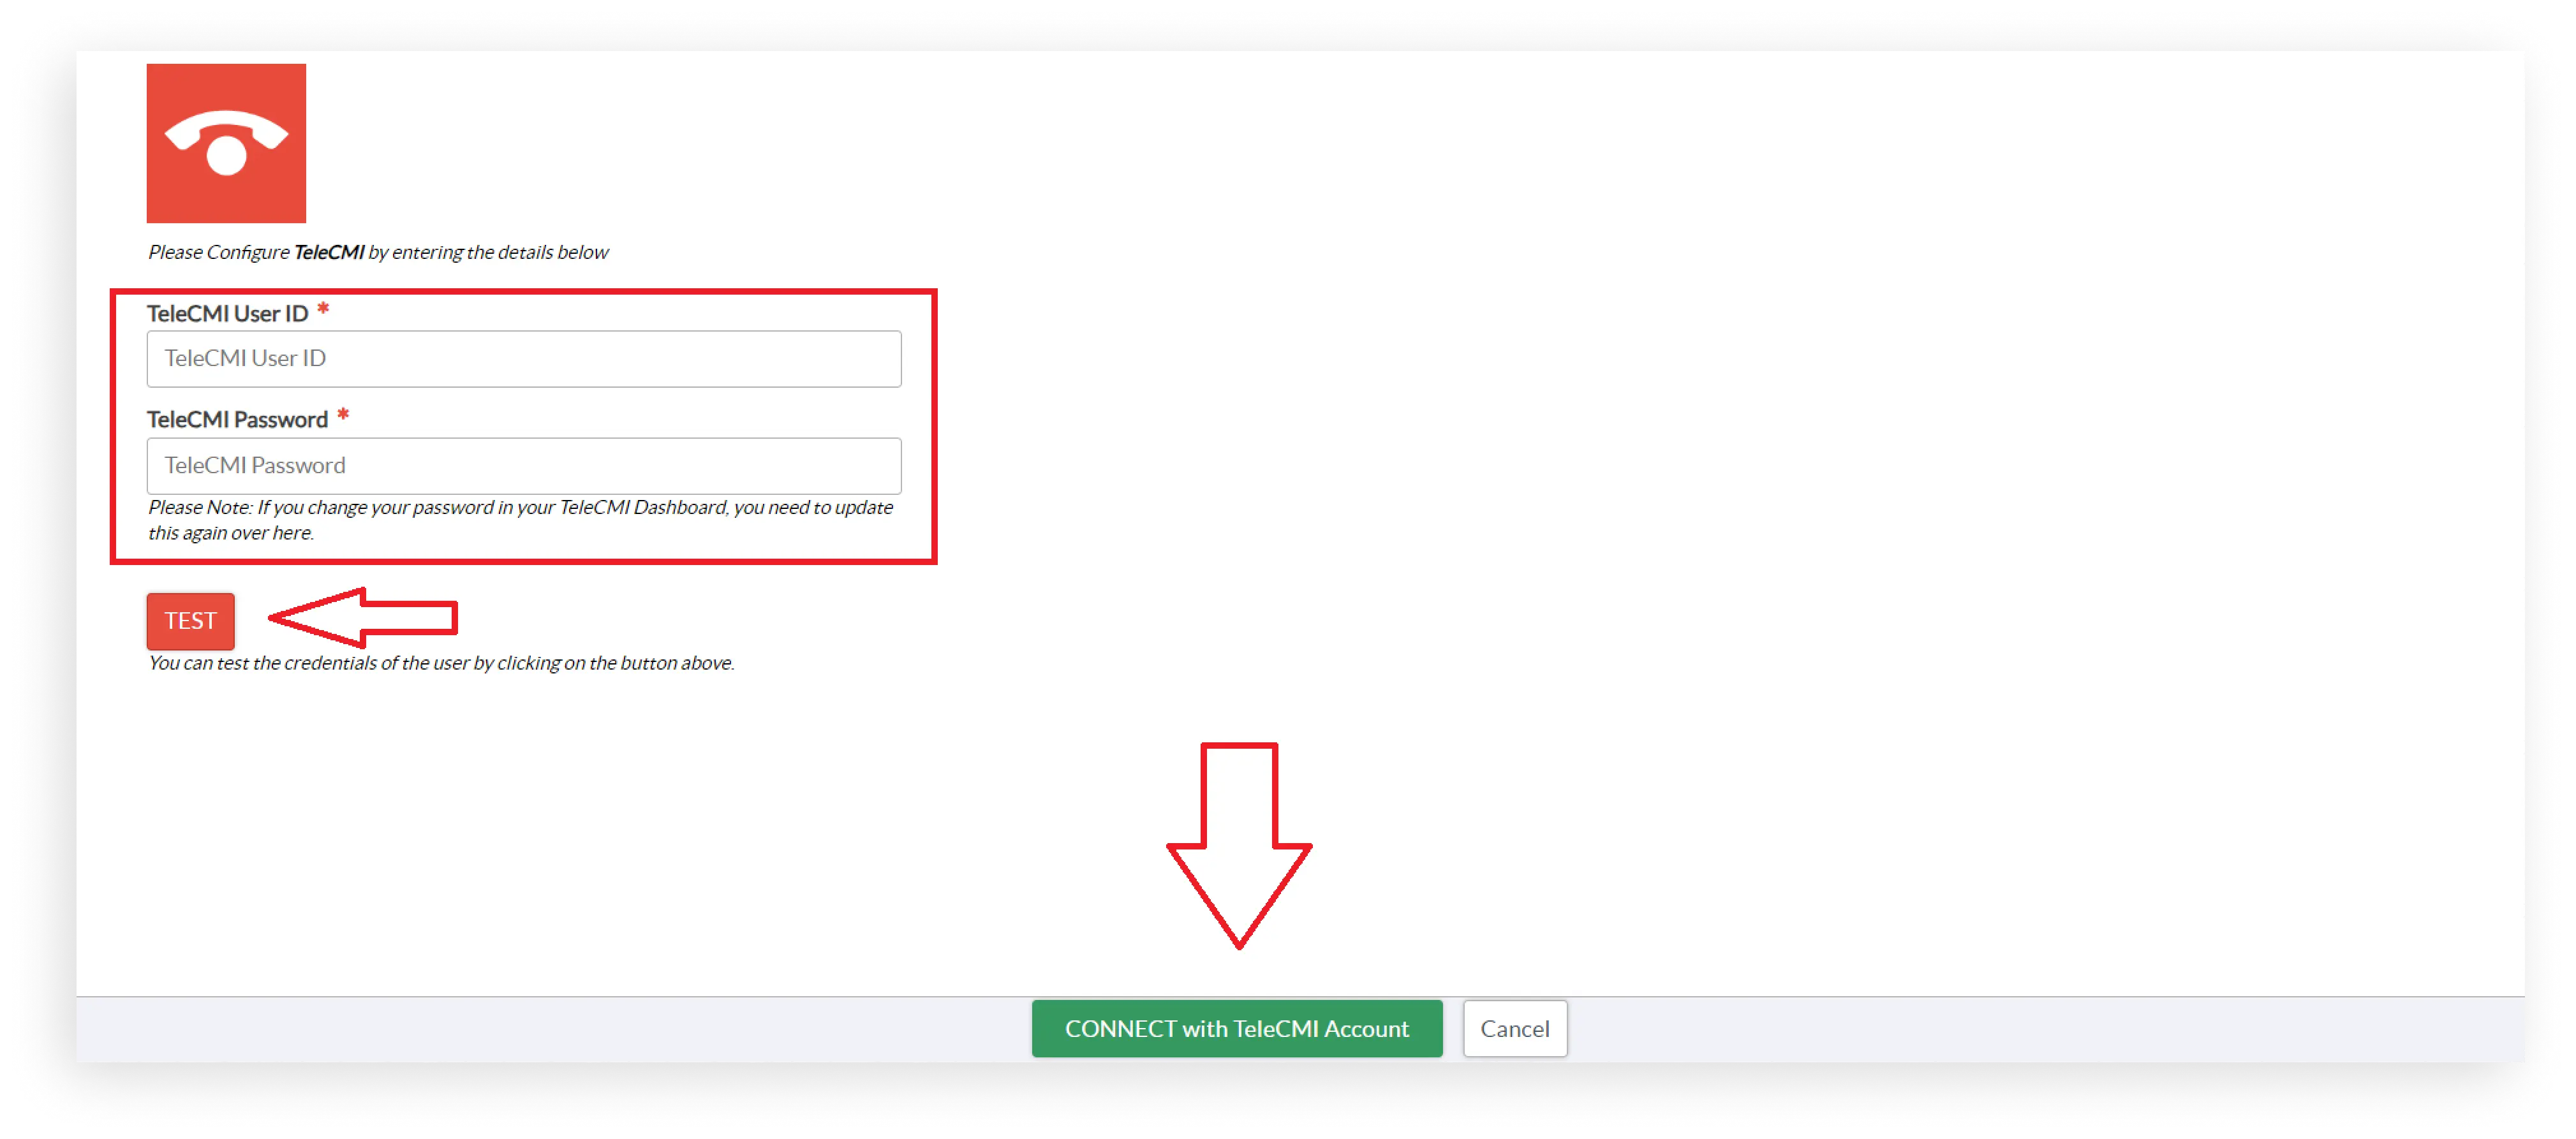
c. Enter the TeleCMI App UserID & Password into the fields below:
You can click on “Test” button to check if the credentials are correct or not. If yes, Click on connect. That’s it you are connected to a TeleCMI account.
Step 3:
Setup Call Recording in TeleCMI
This is required if you want to sync the call records/logs from TeleCMI into Clinicea Cloud.
The steps to it are as follows:
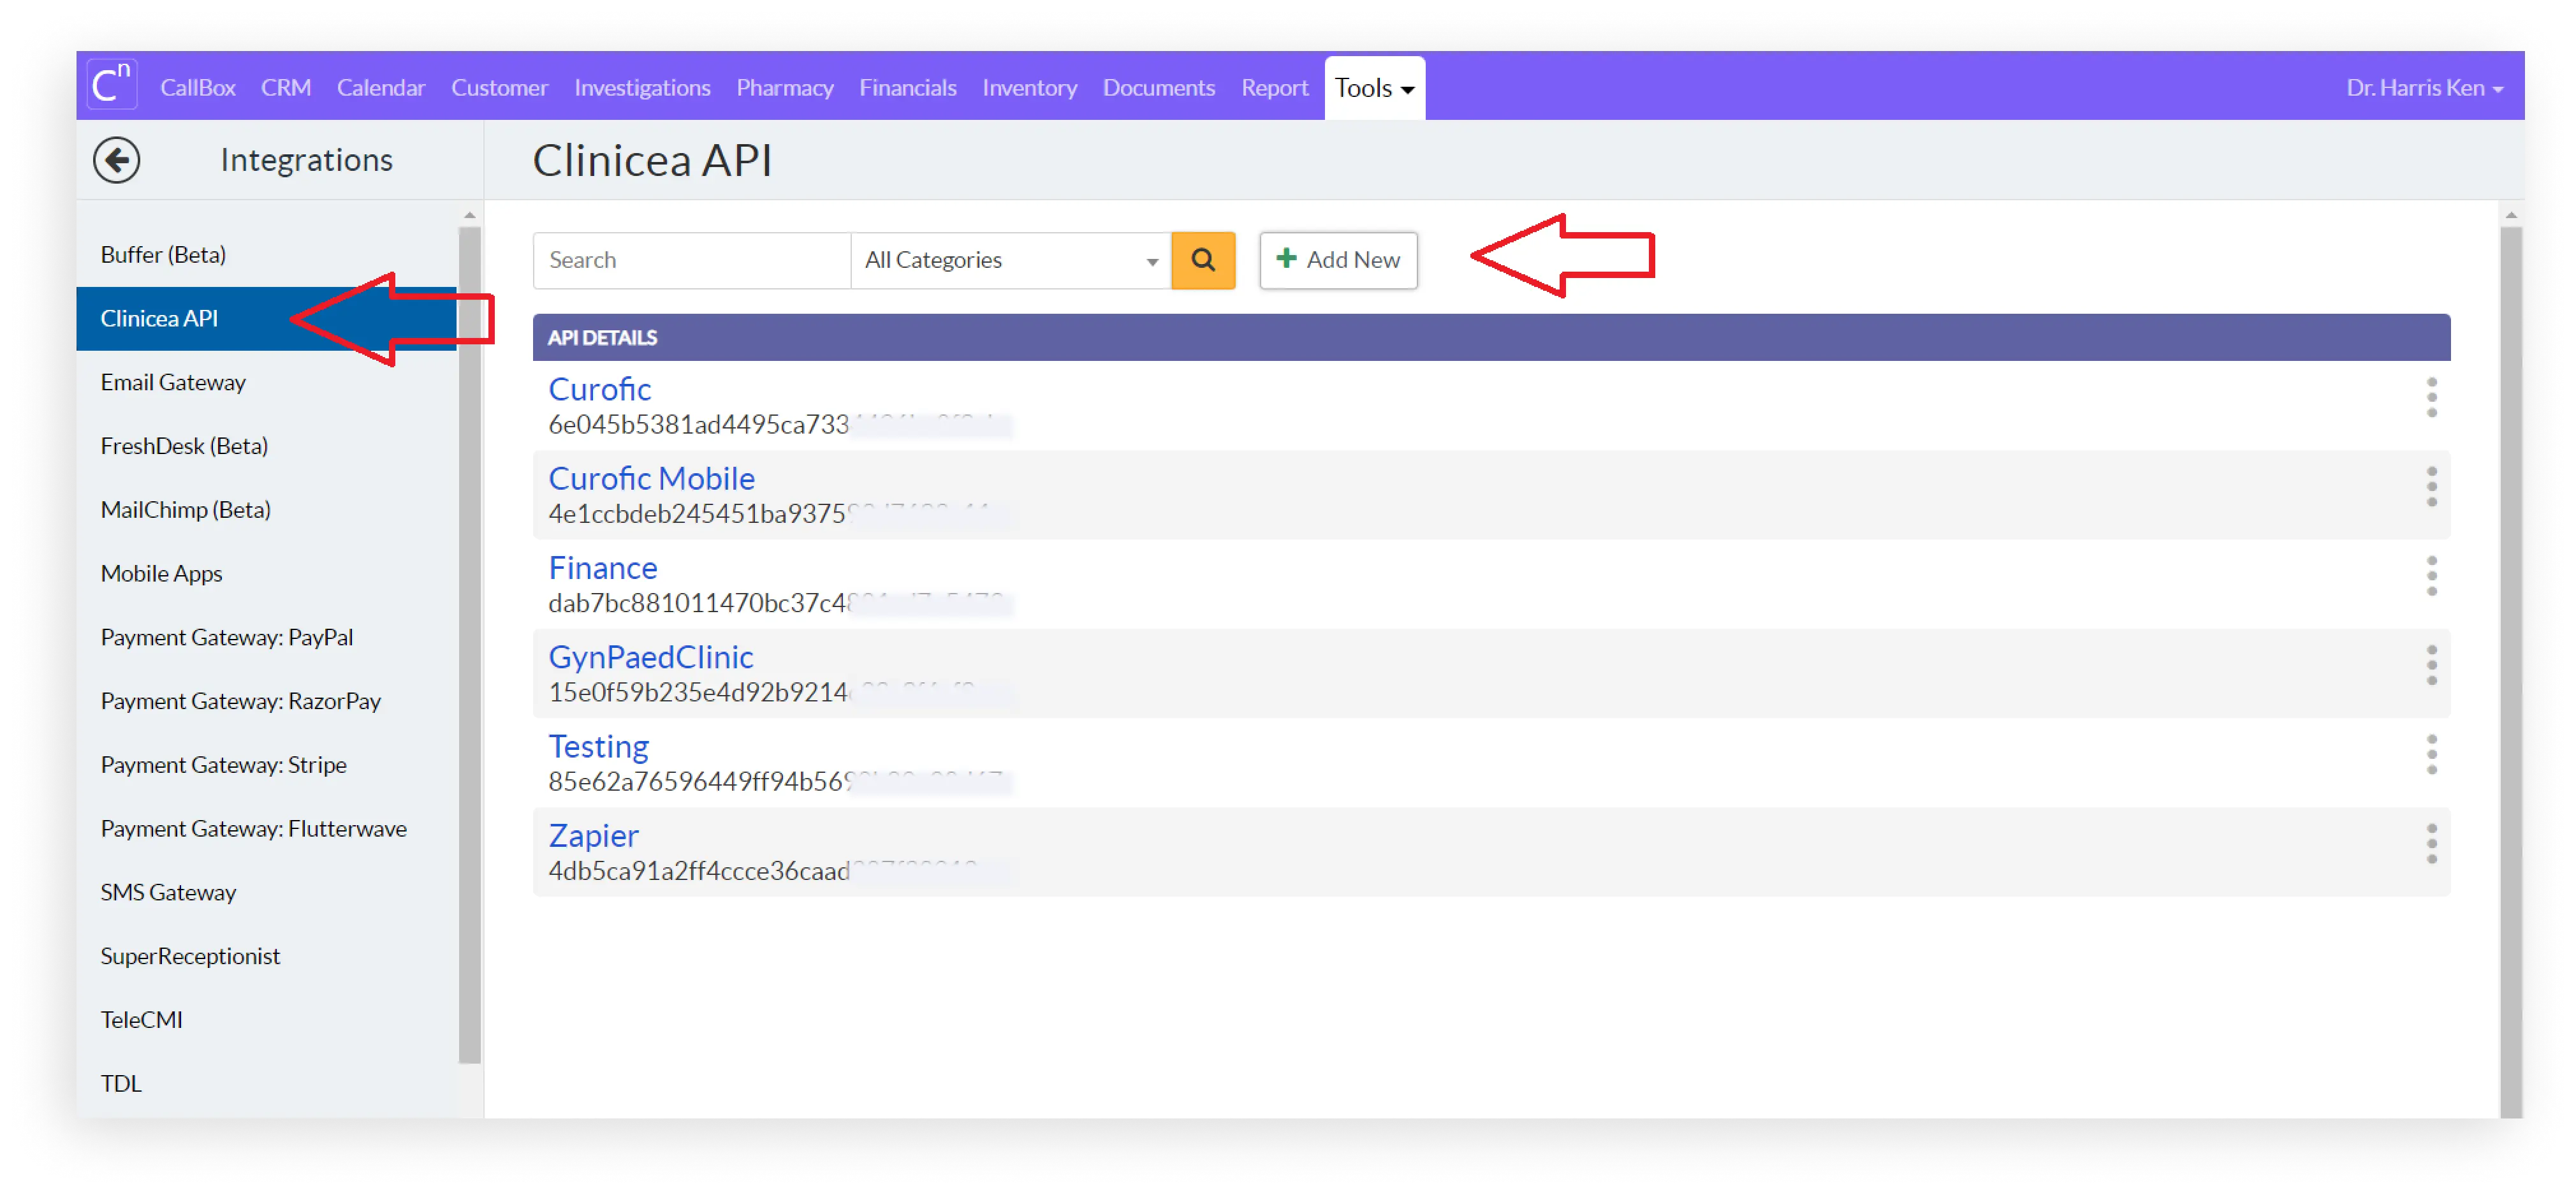
a. Go to Tools -> Organization -> Integration -> API key.
b. Generate an API key and Copy it.
c. Now, click TeleCMI from the left-hand side and copy the webhook URL.
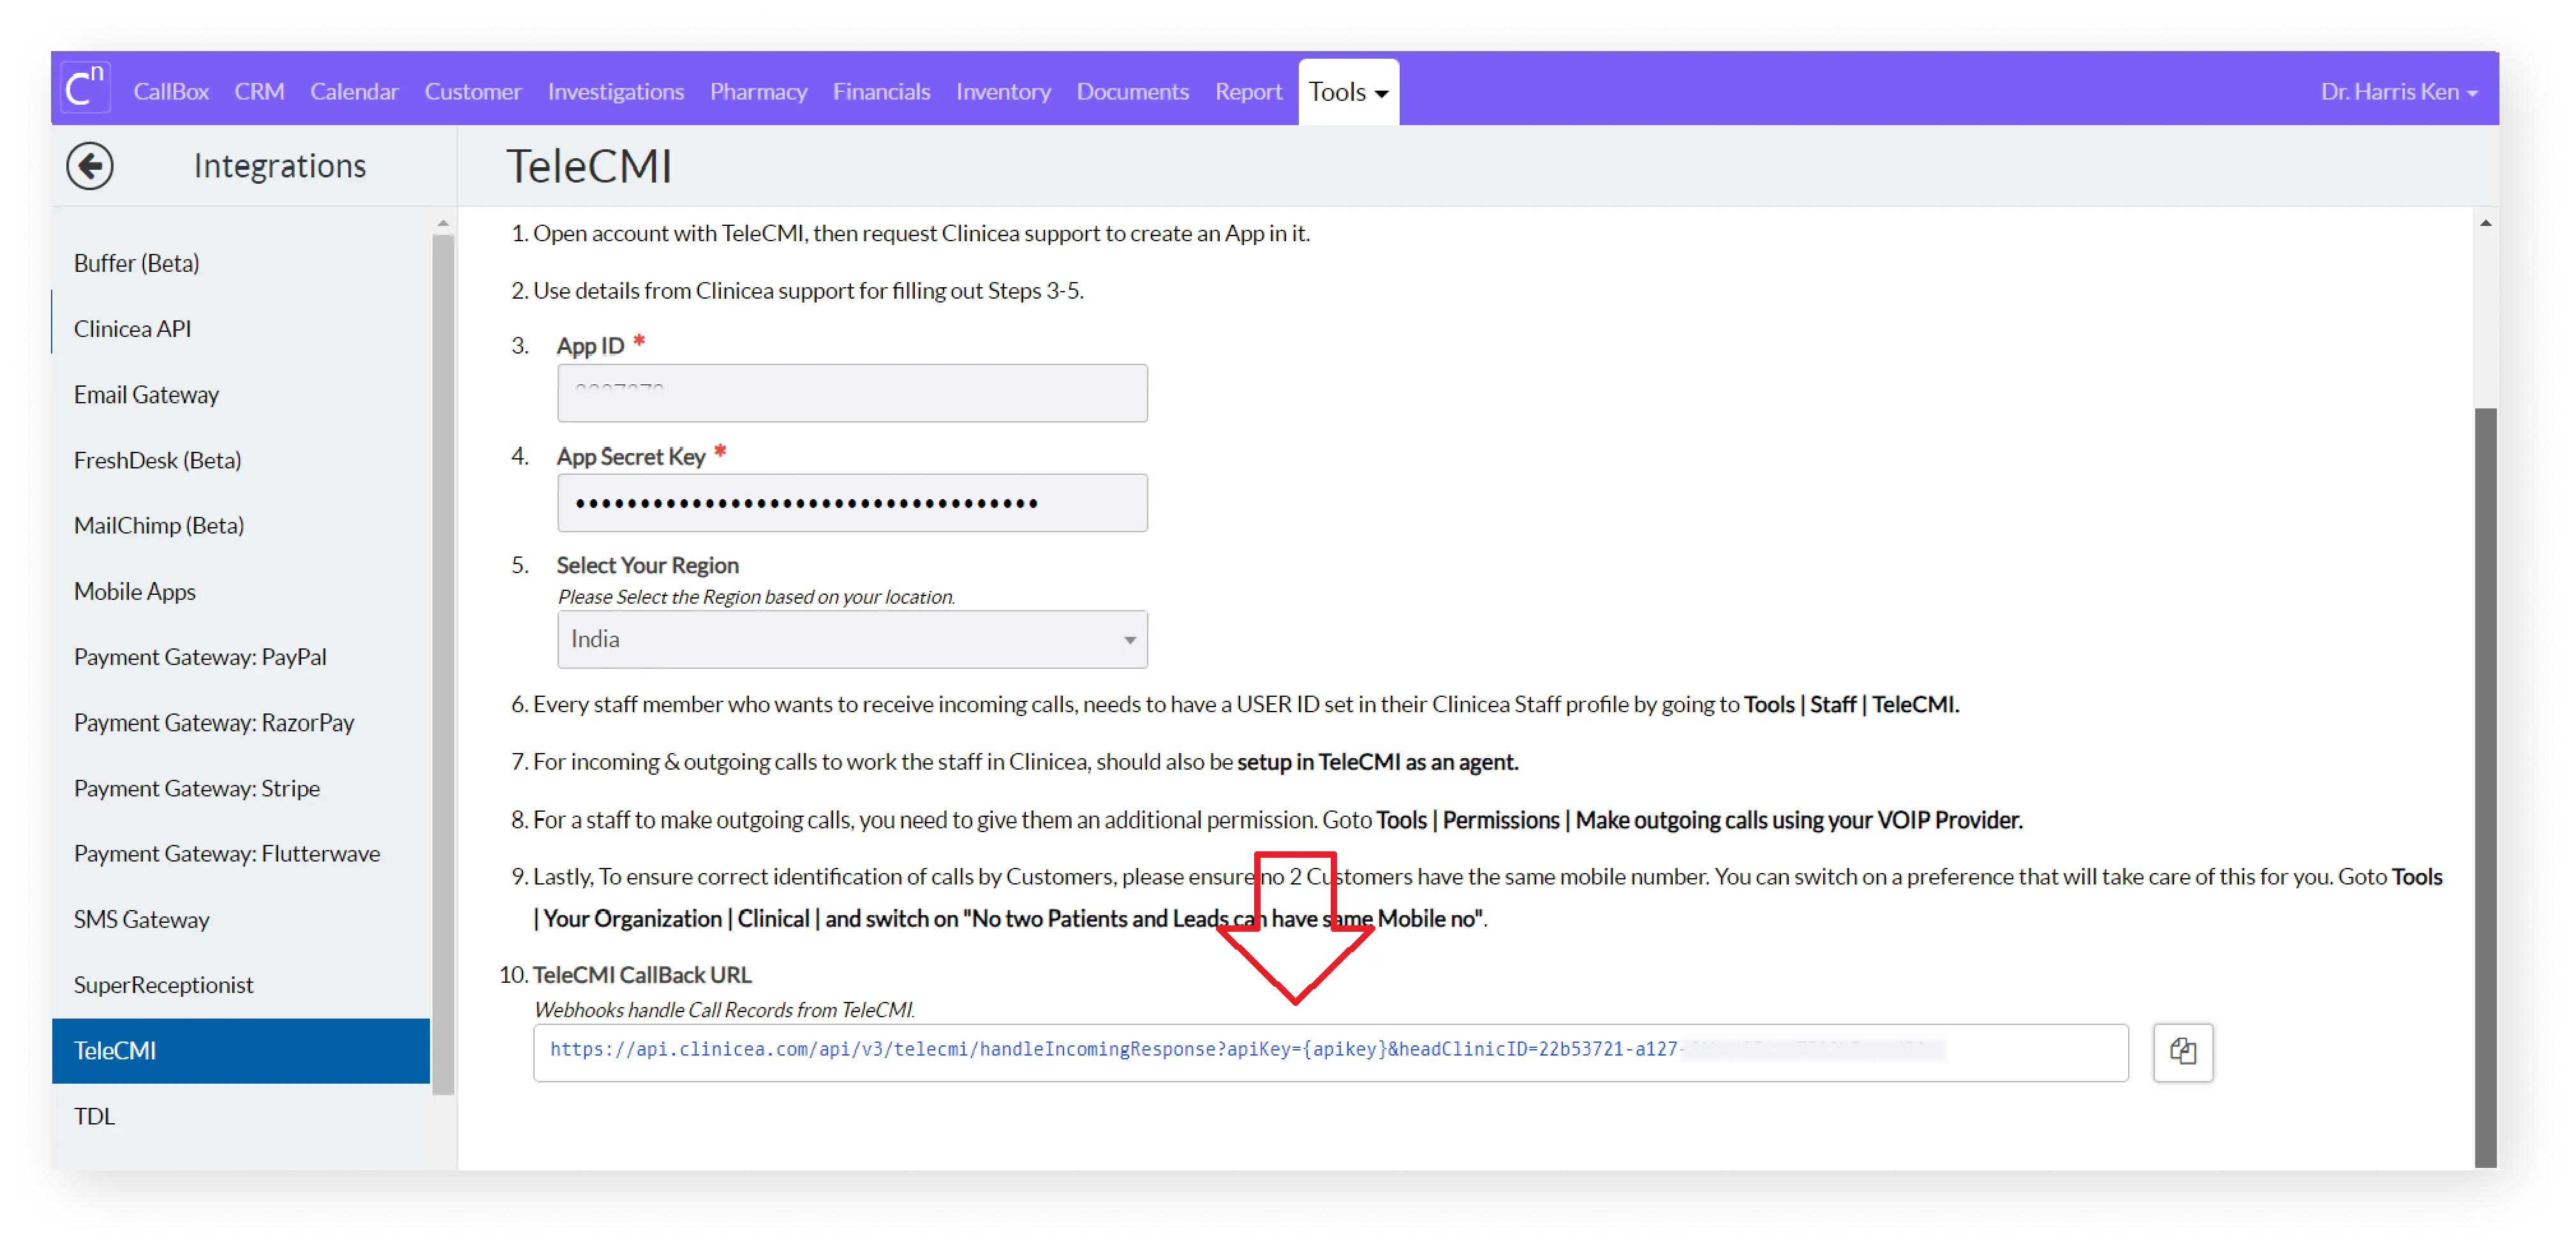
d. Replace the API key in the URL with the API key you have just copied.
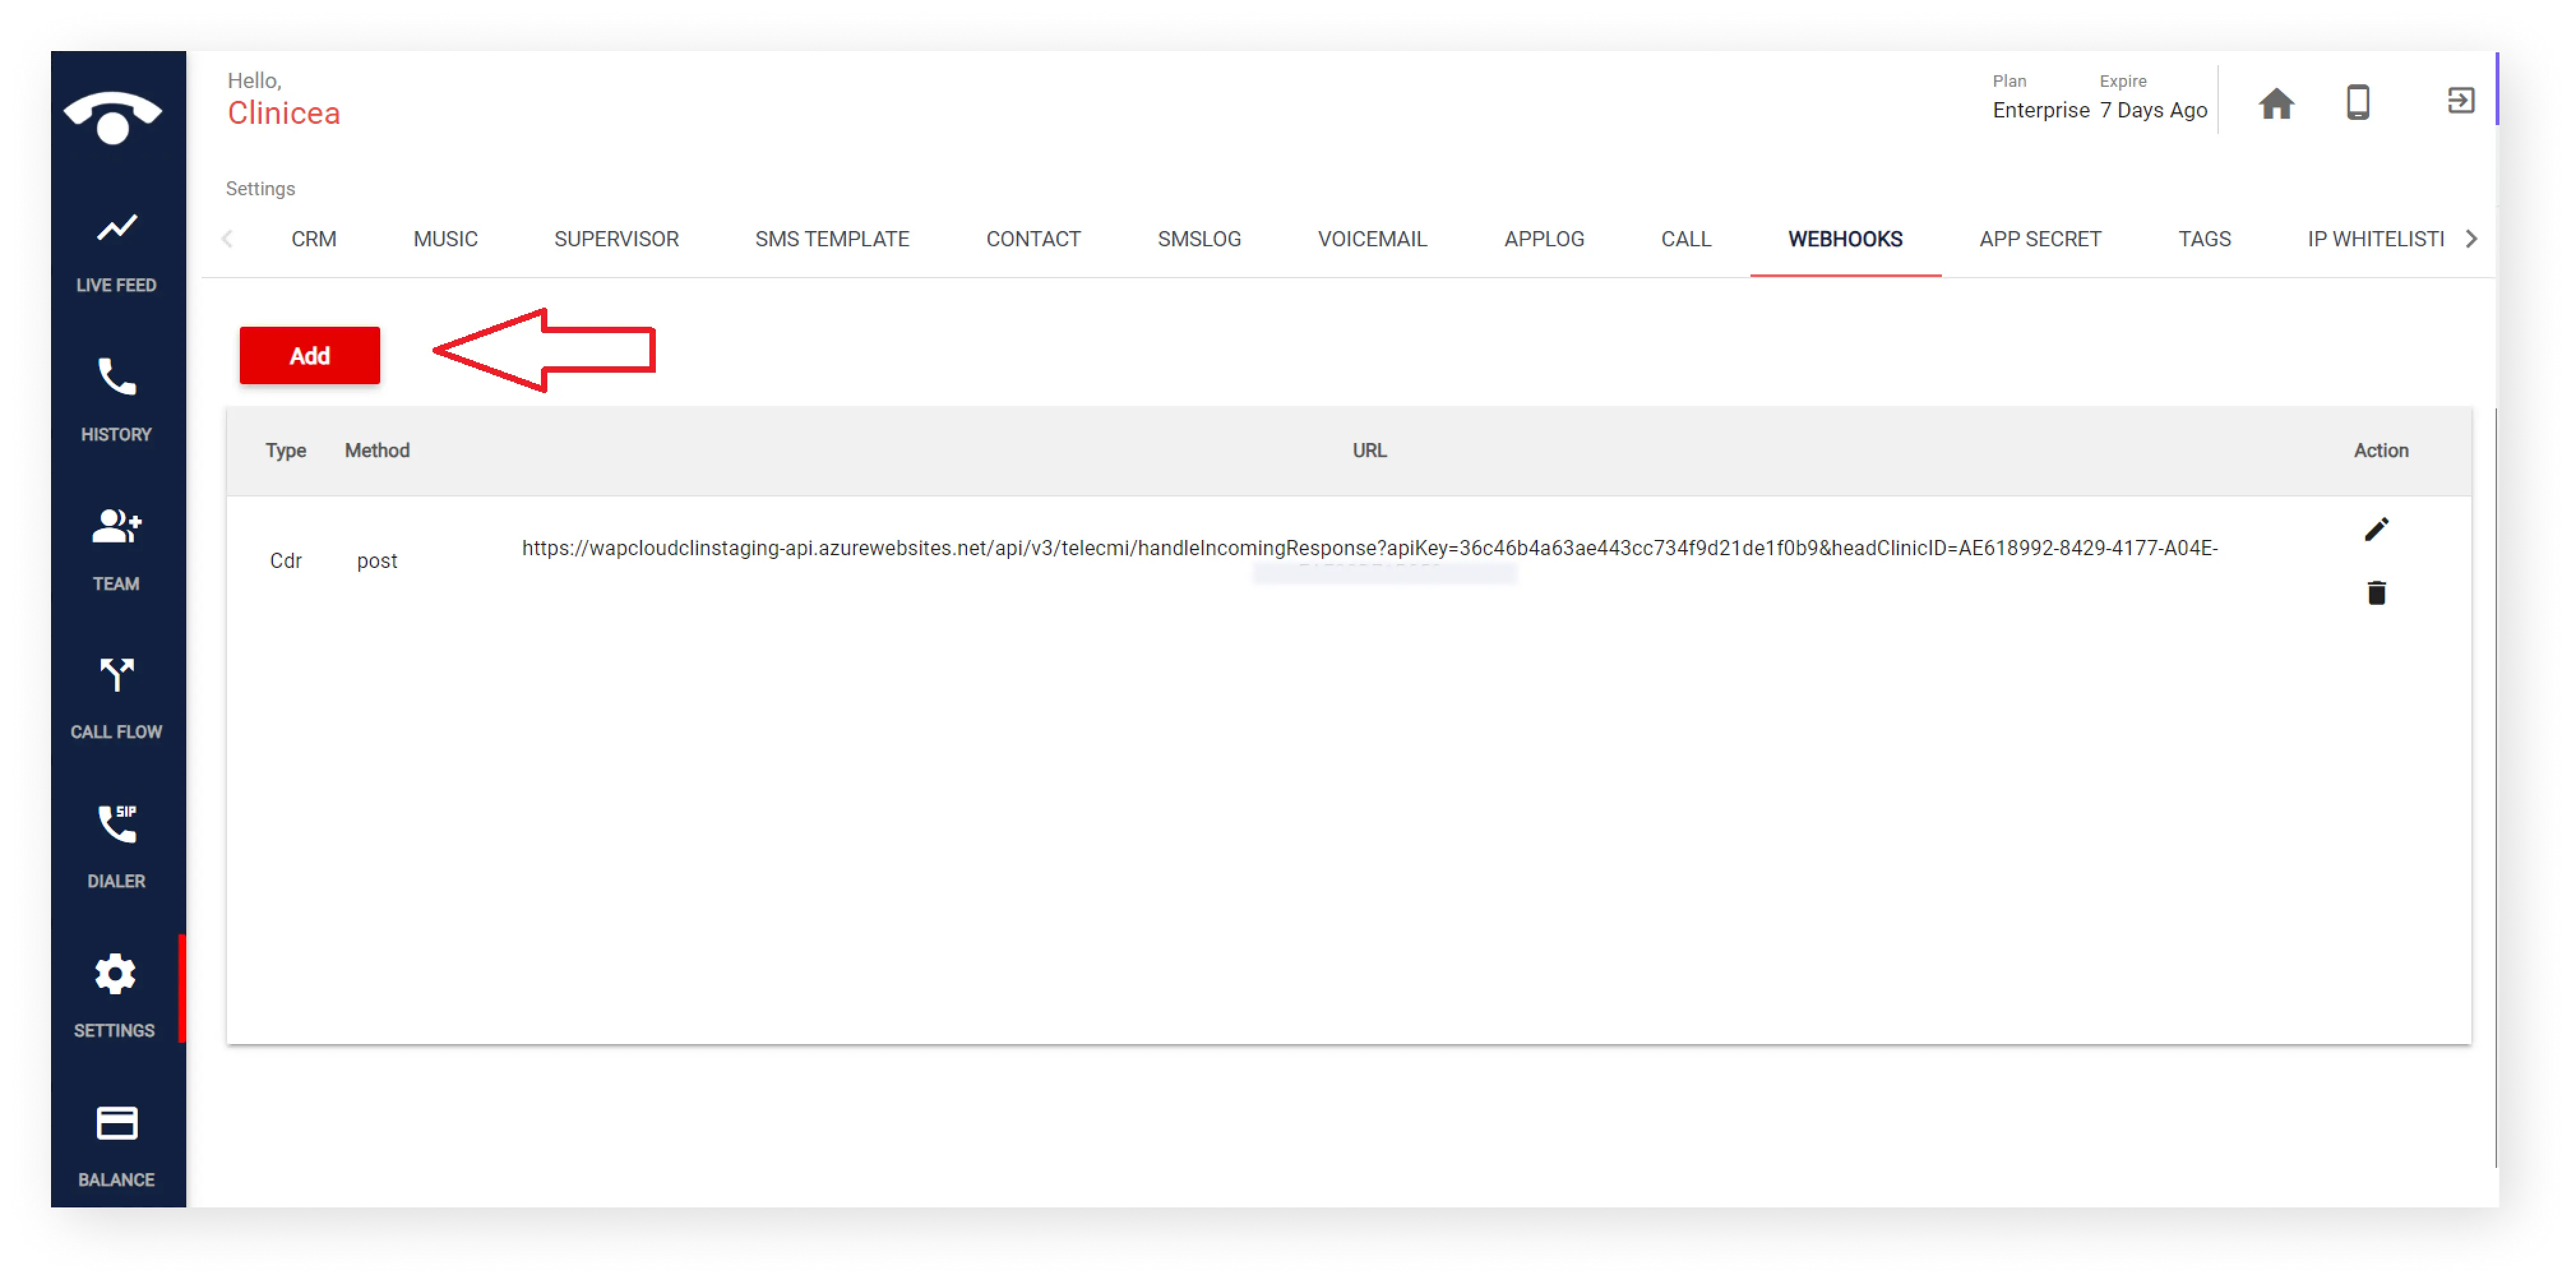
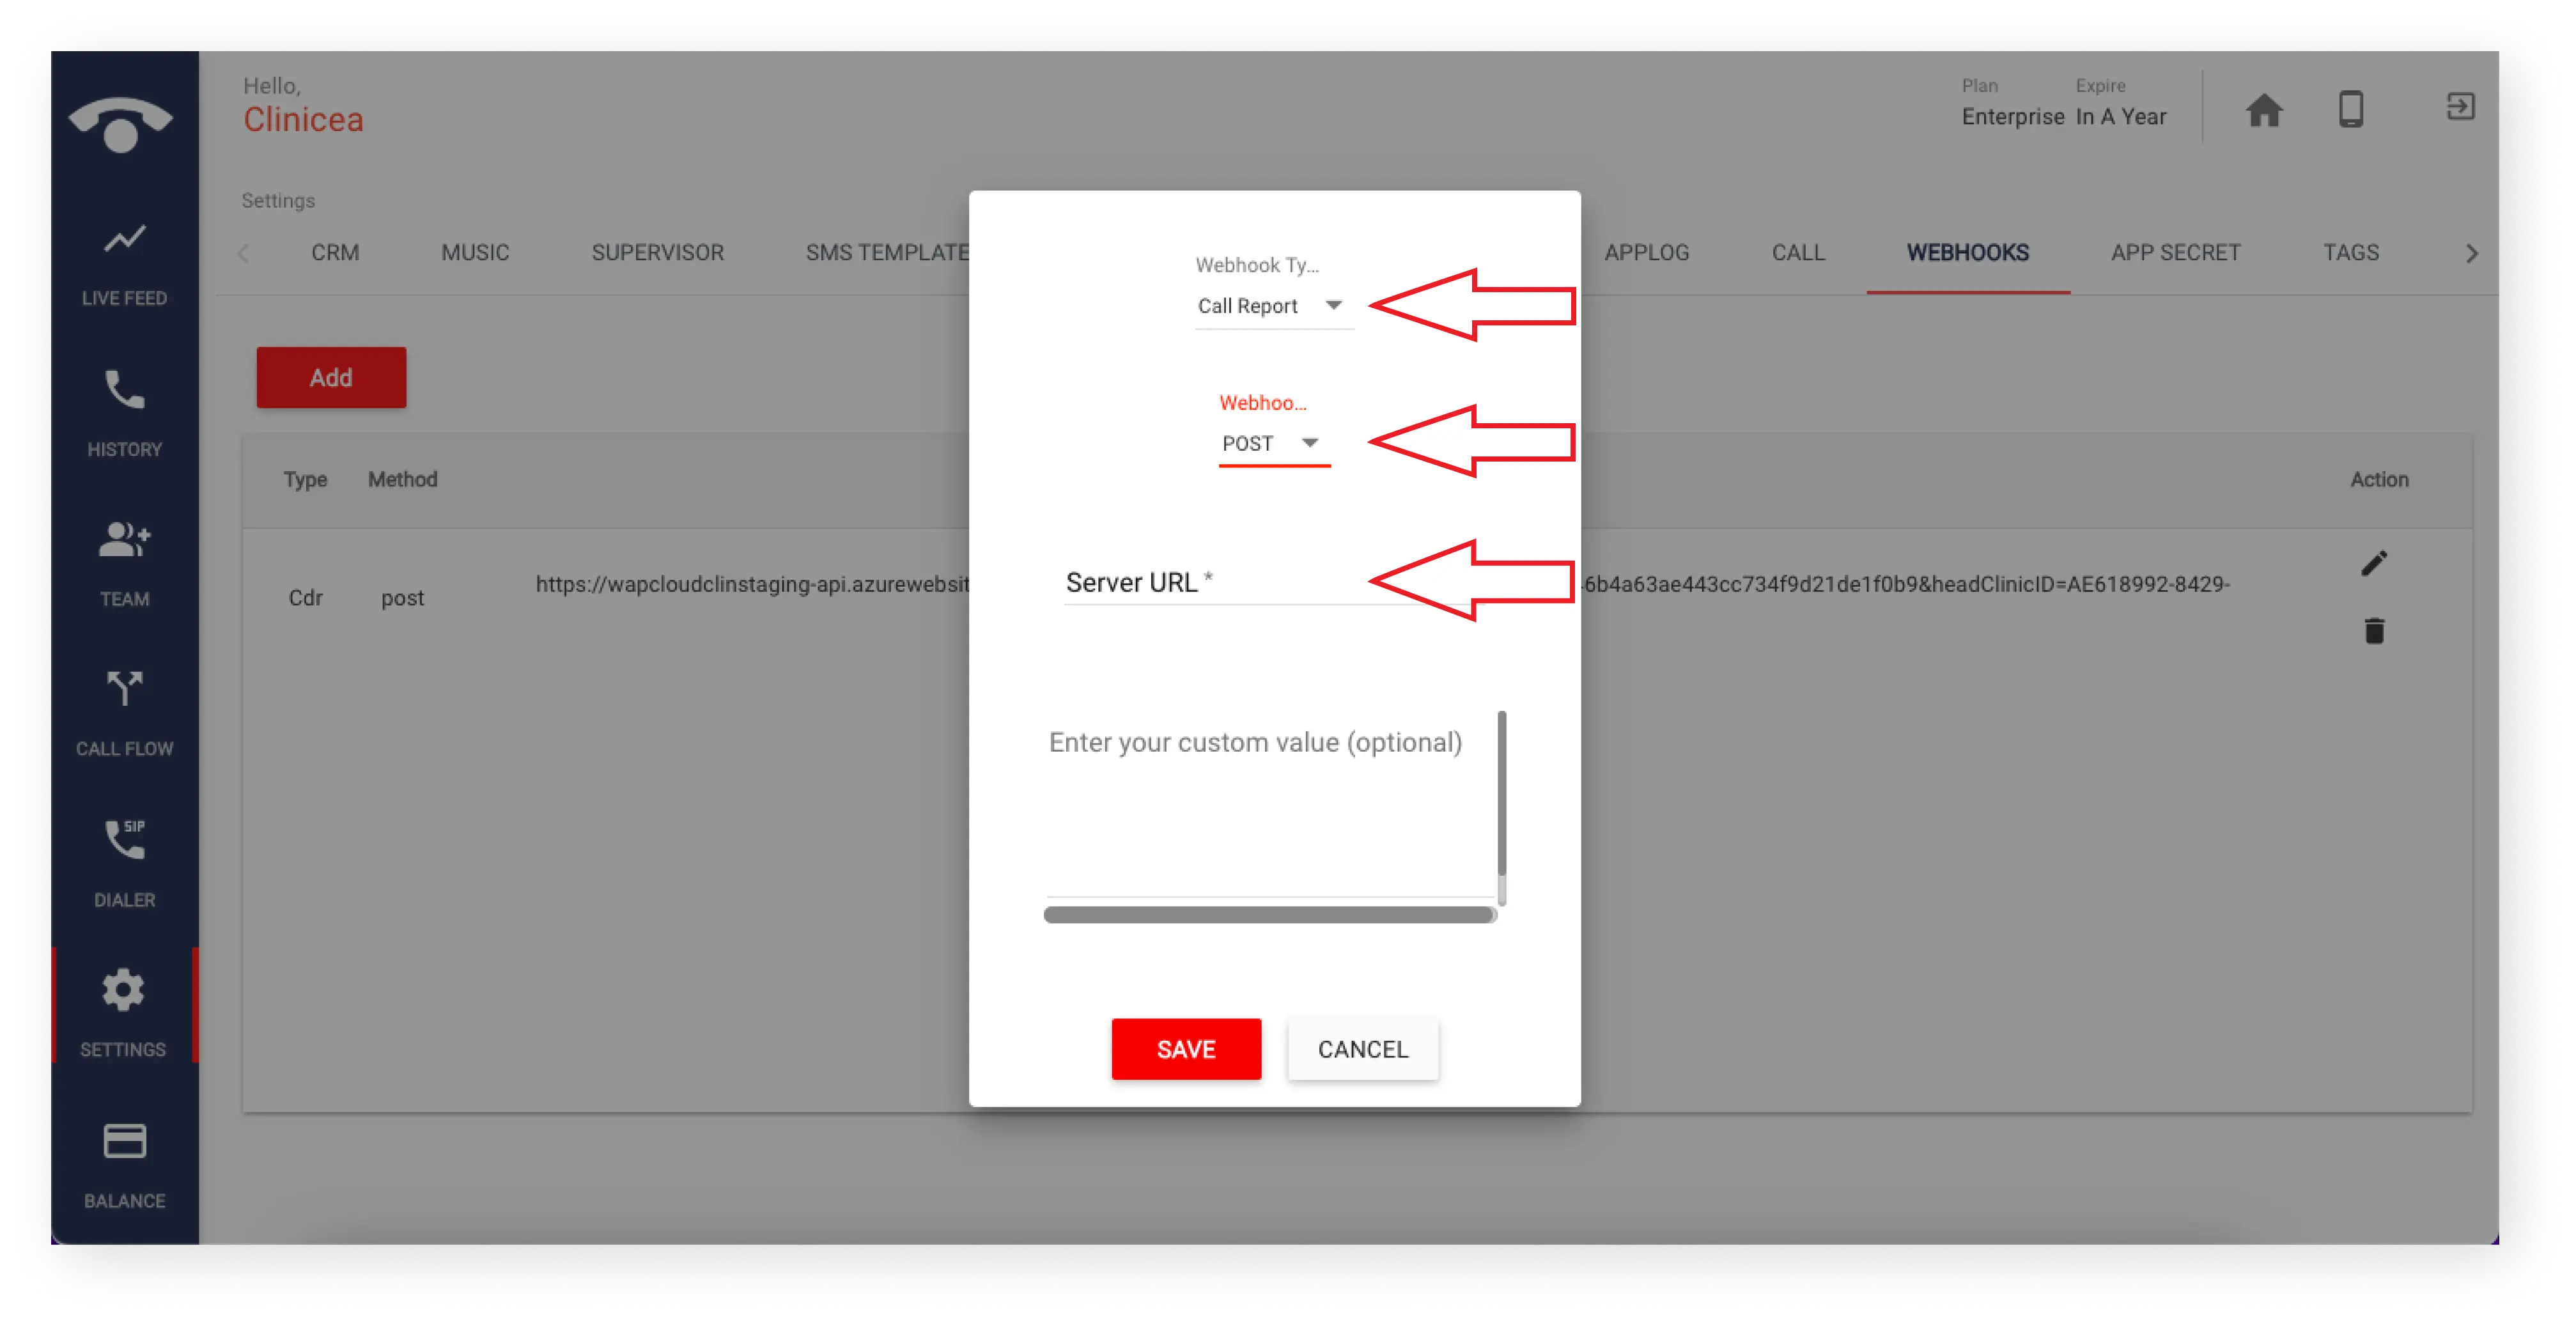
e. Login into your TeleCMI dashboard. Go to {Your App} -> Settings -> Webook -> Add.
f. Select Type as “Call Report”, Webhook Method as “Post”, and paste the Server URL.
Step 4:
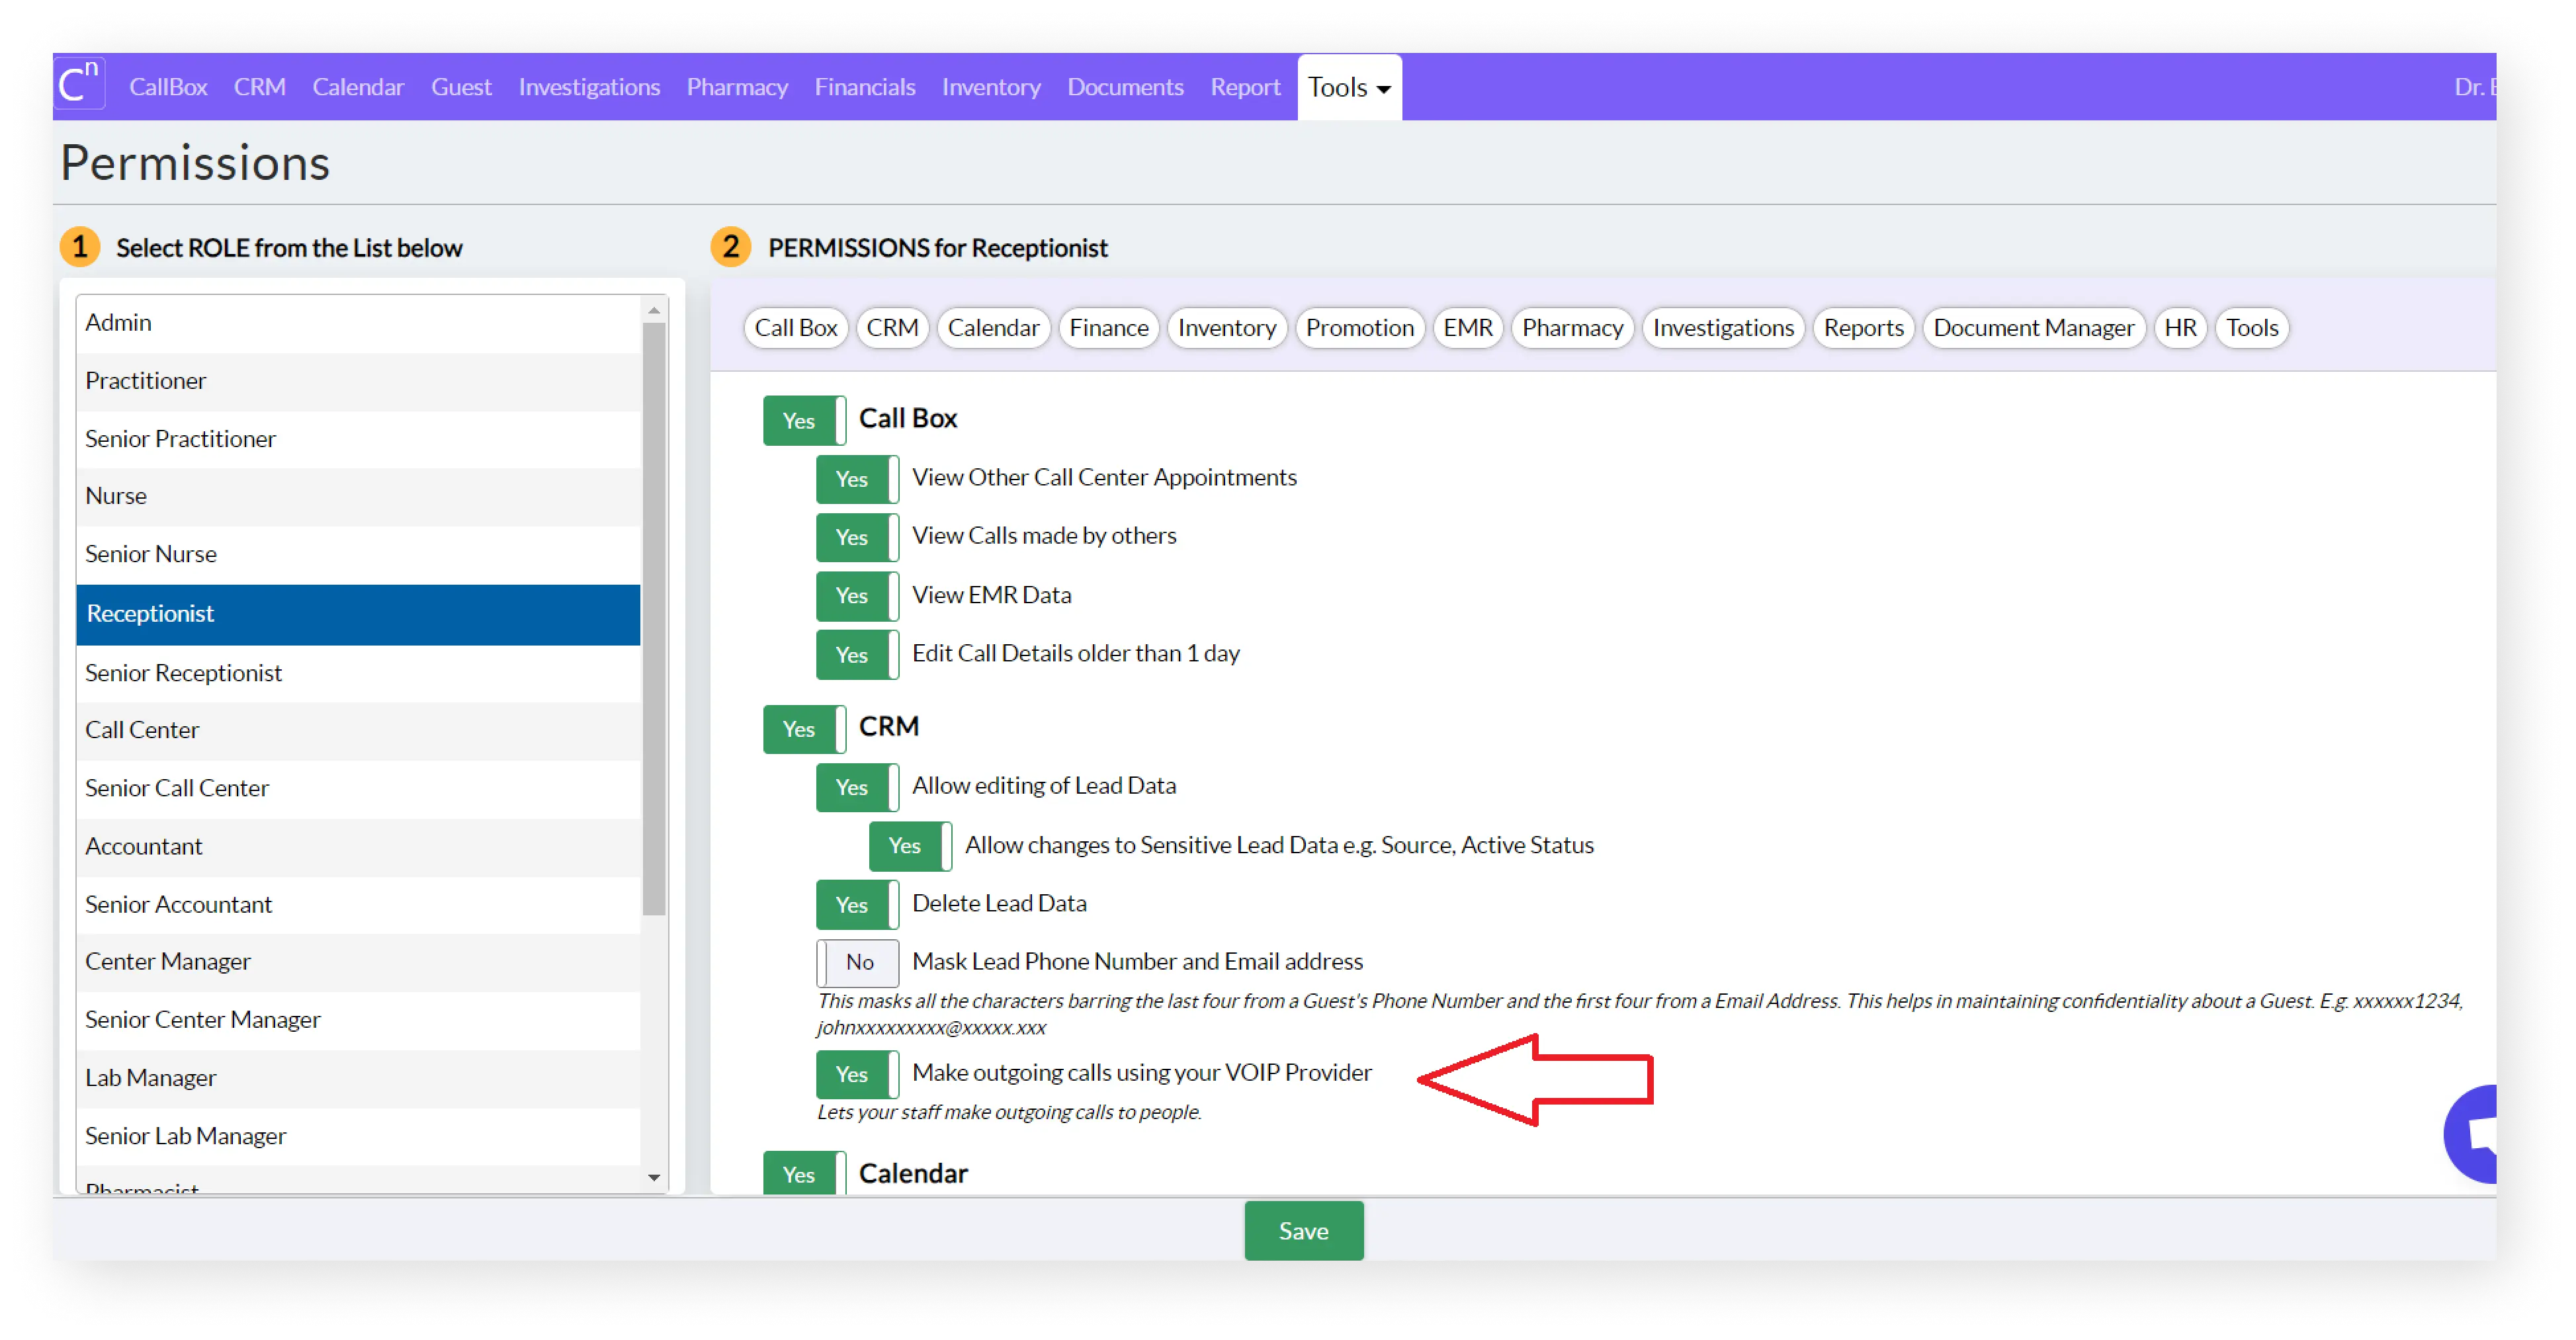
Setup Outgoing call
If you want your staff to do outgoing Calls, you need to permit them. Please go to tools-> Permission-> Select Role from LHS -> Make outgoing calls using your VOIP Provider.
Step 5:
Application in Clinicea Cloud
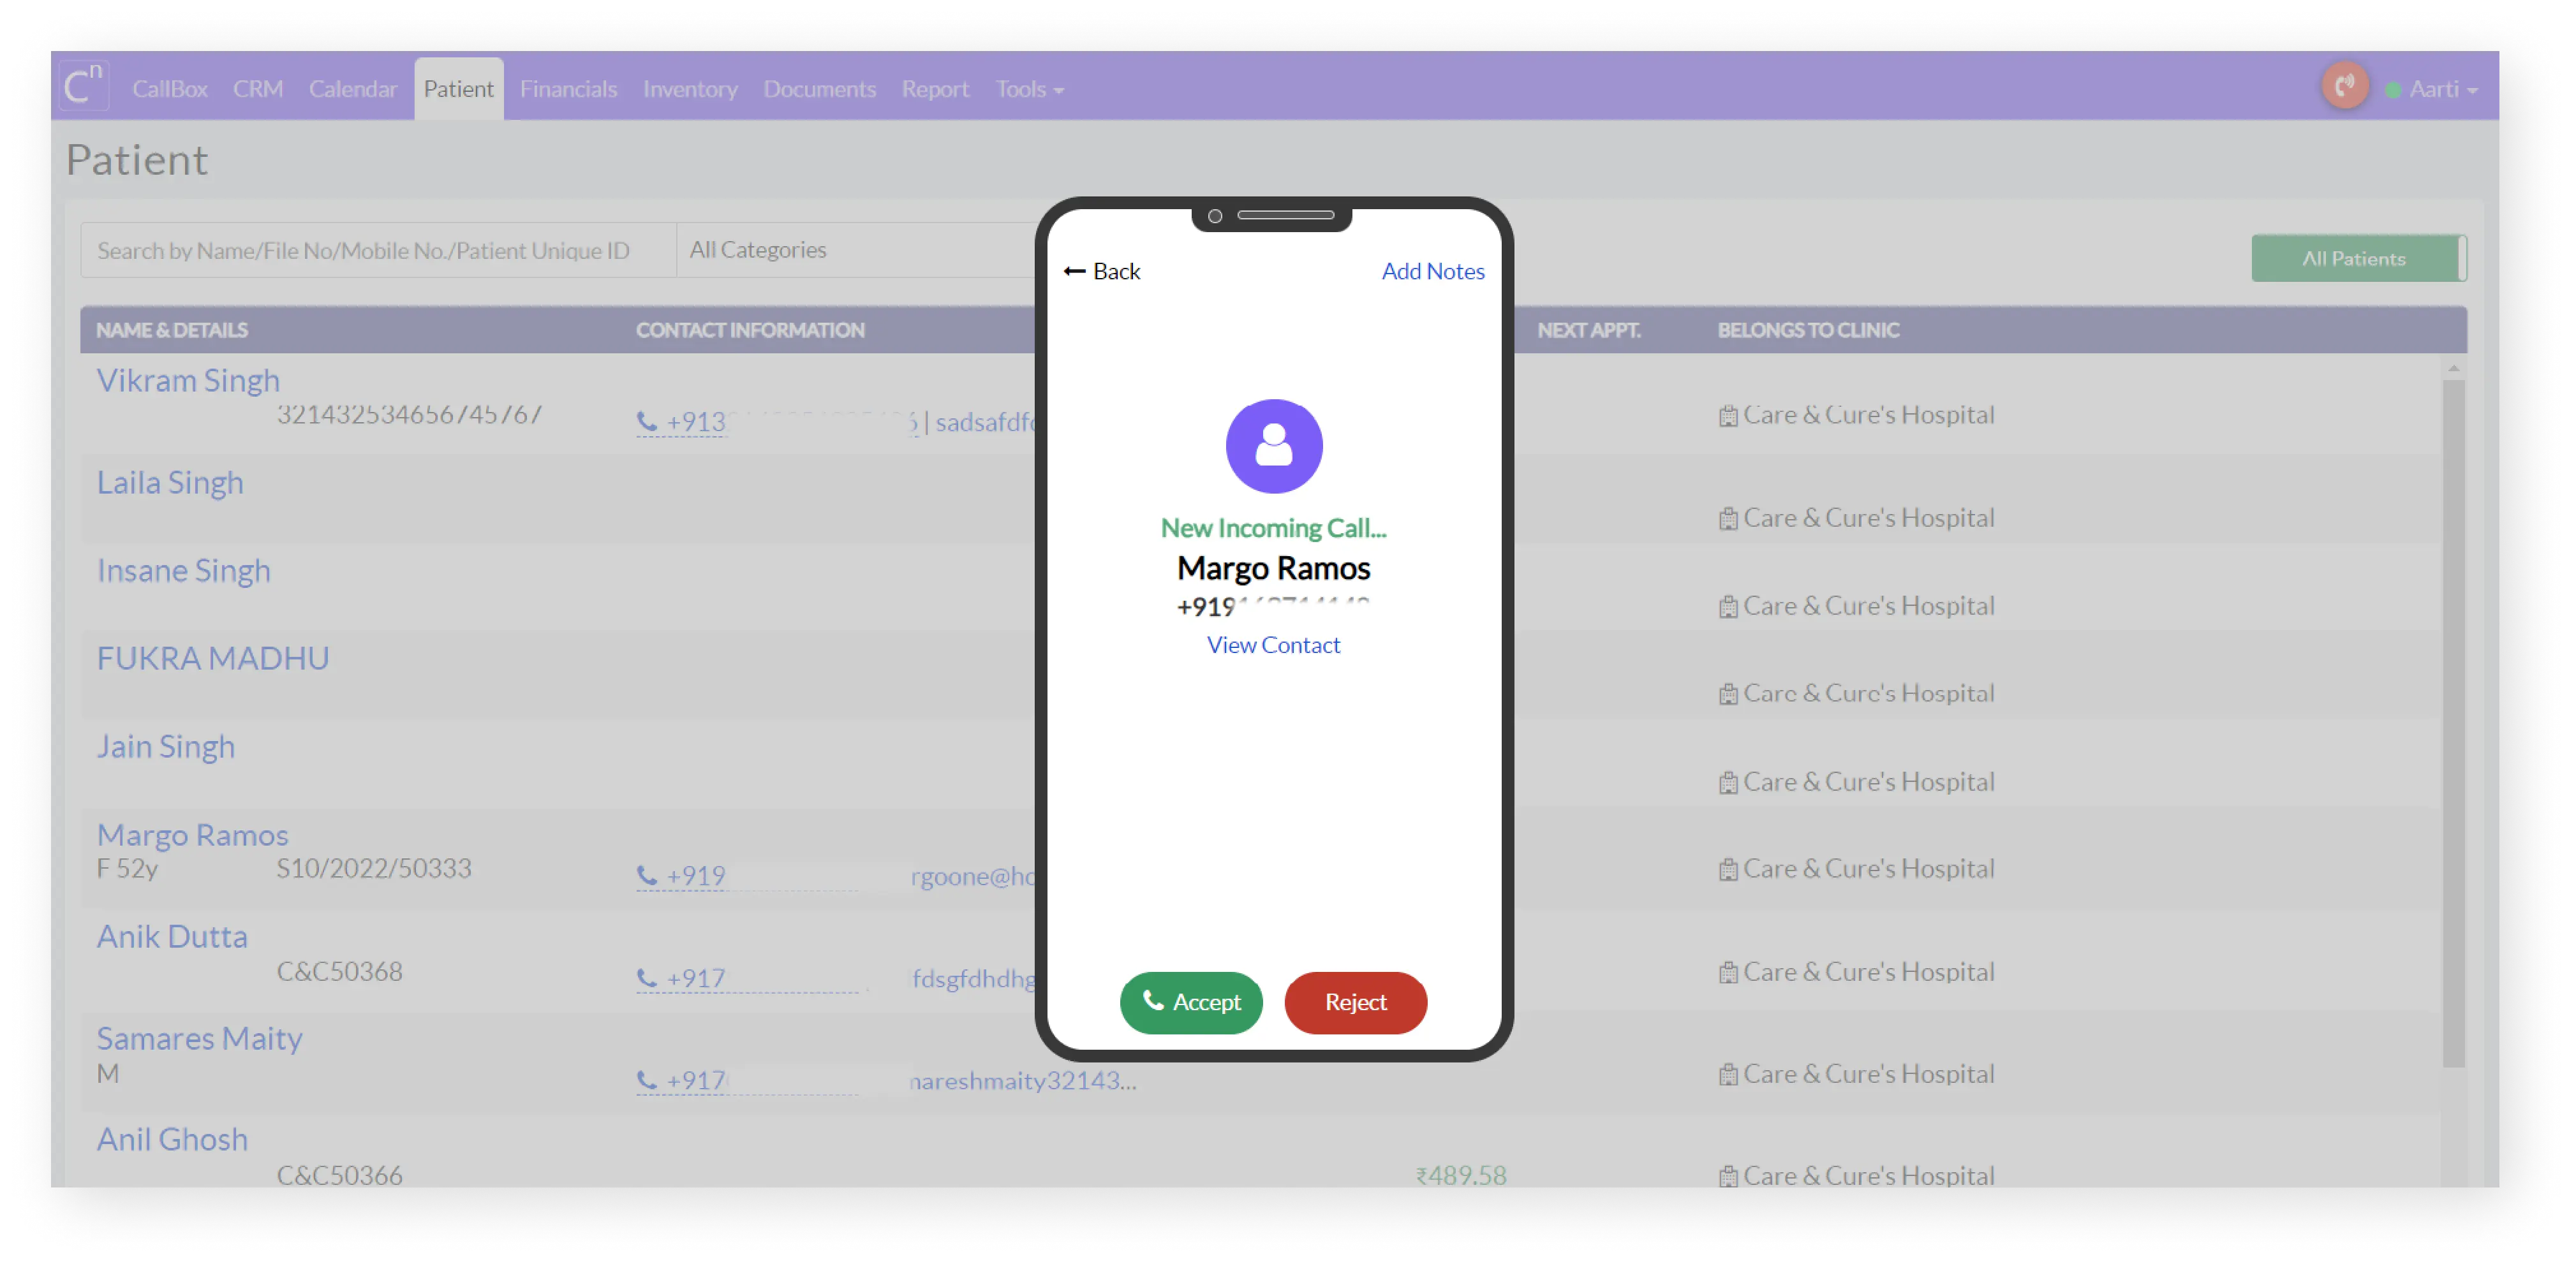
a. If a staff Logs in Clinicea who is connected to Tele-CMI, they will get incoming calls in Clinicea on a softphone.
The user needs to accept/reject.
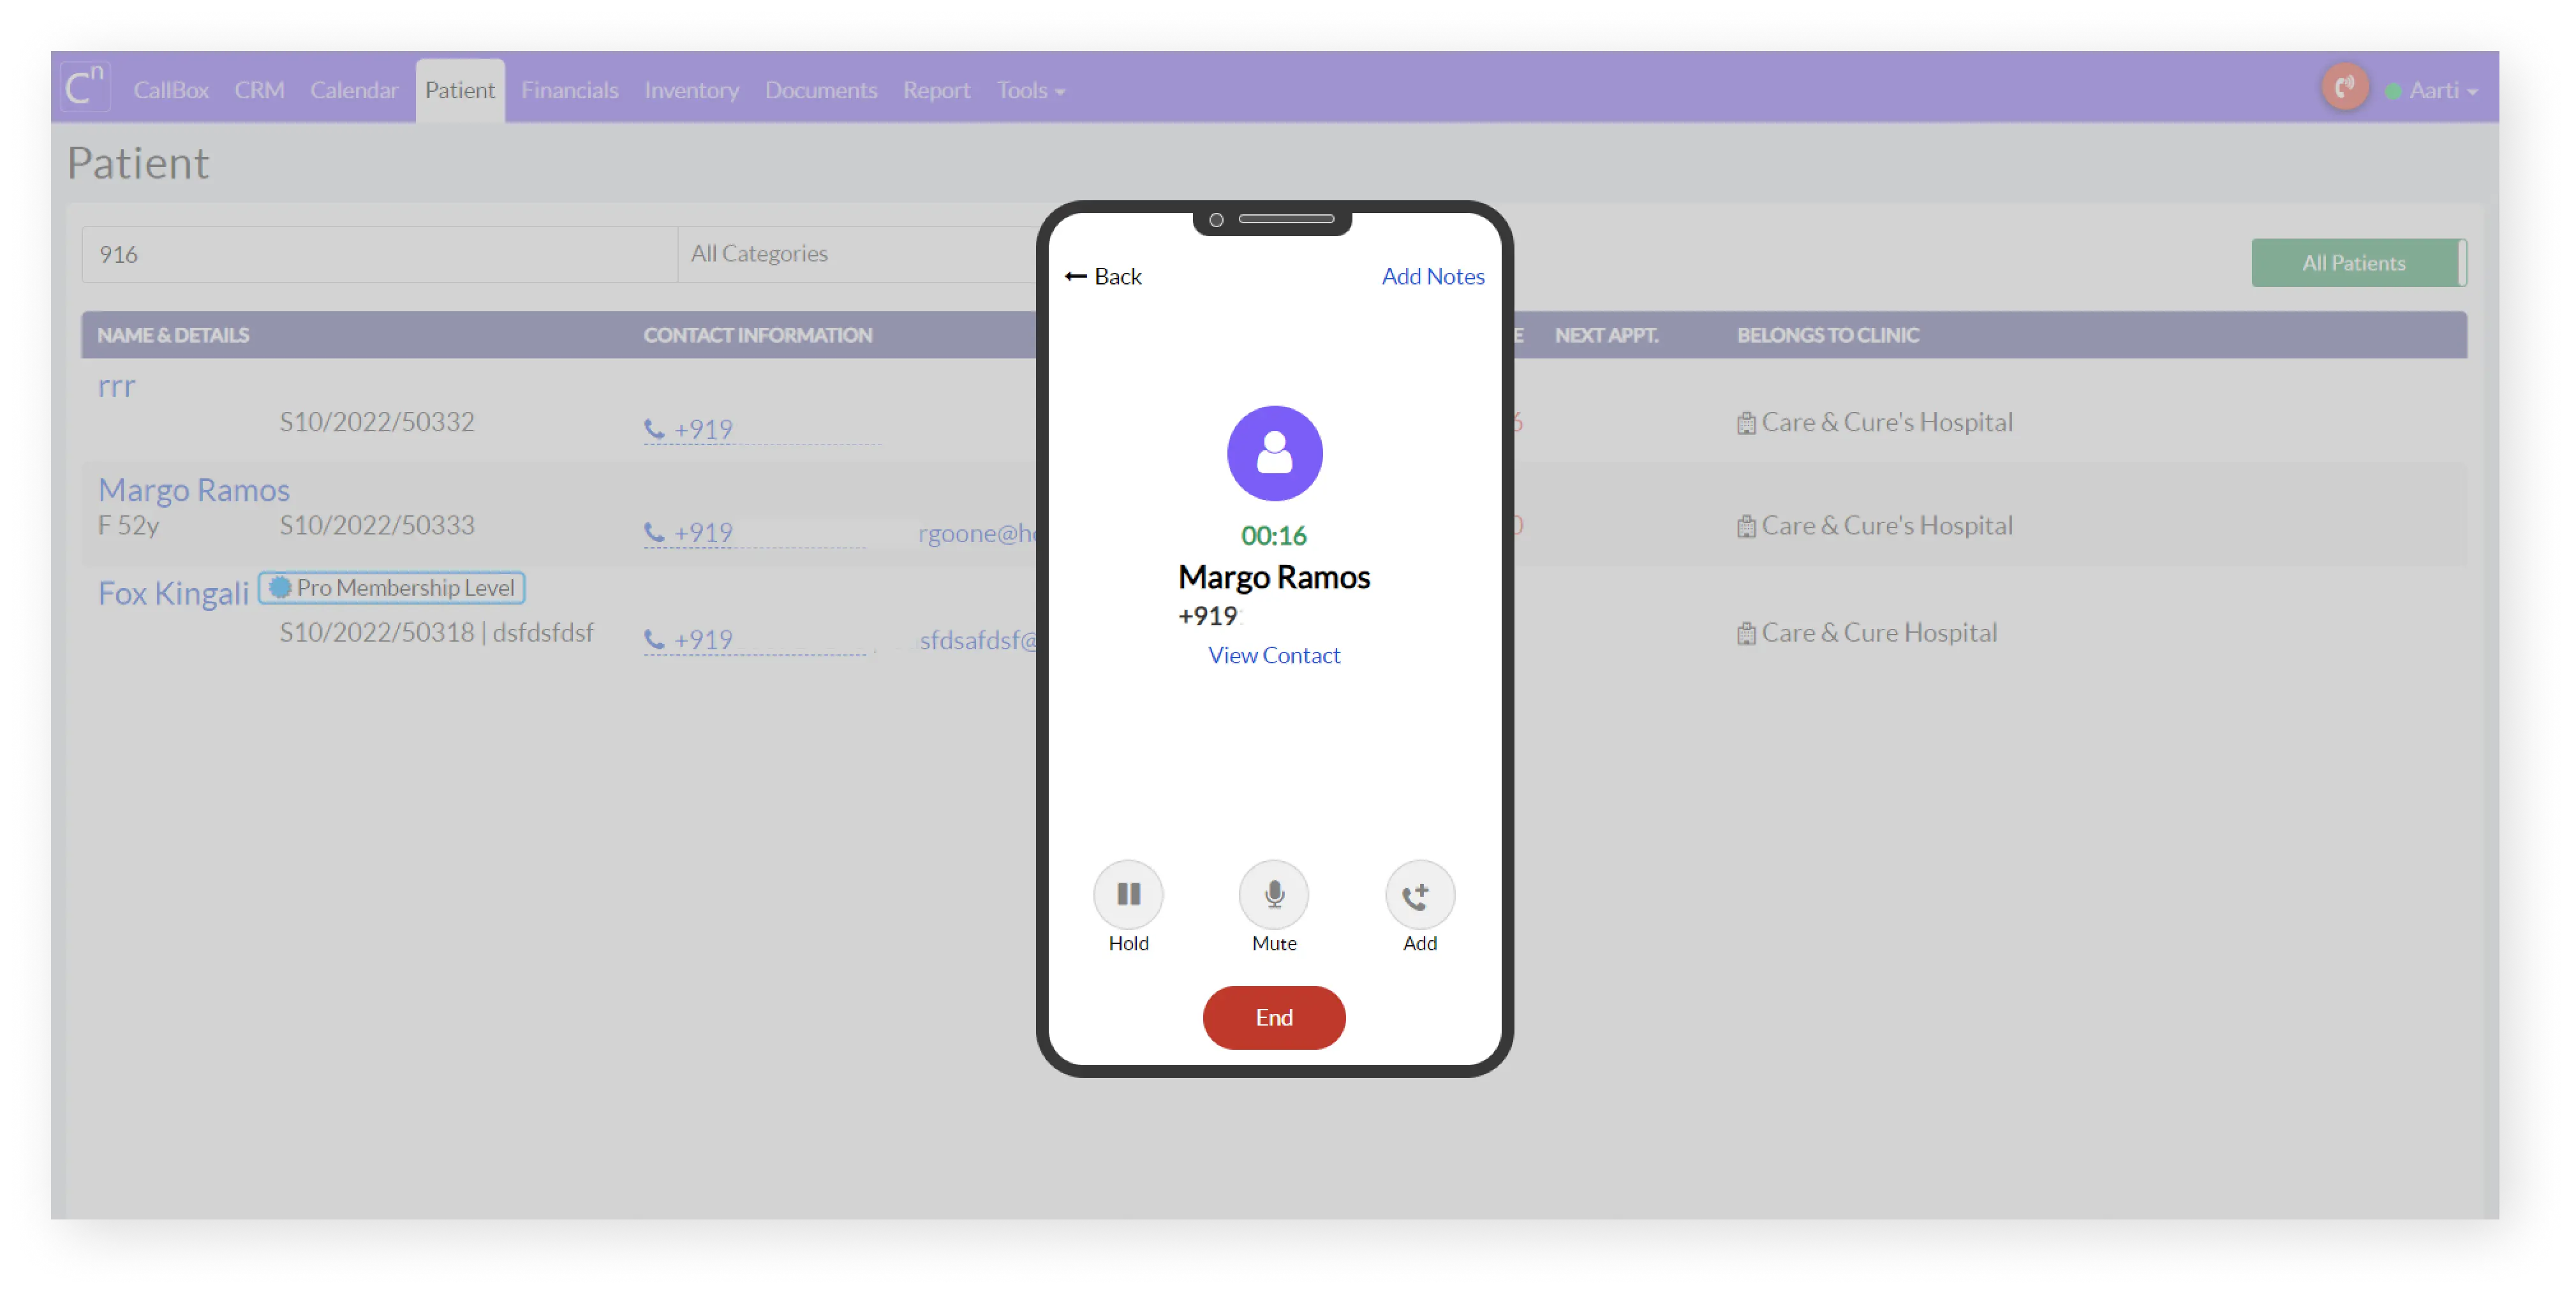
b. When the Call is active, the UI looks like the following.
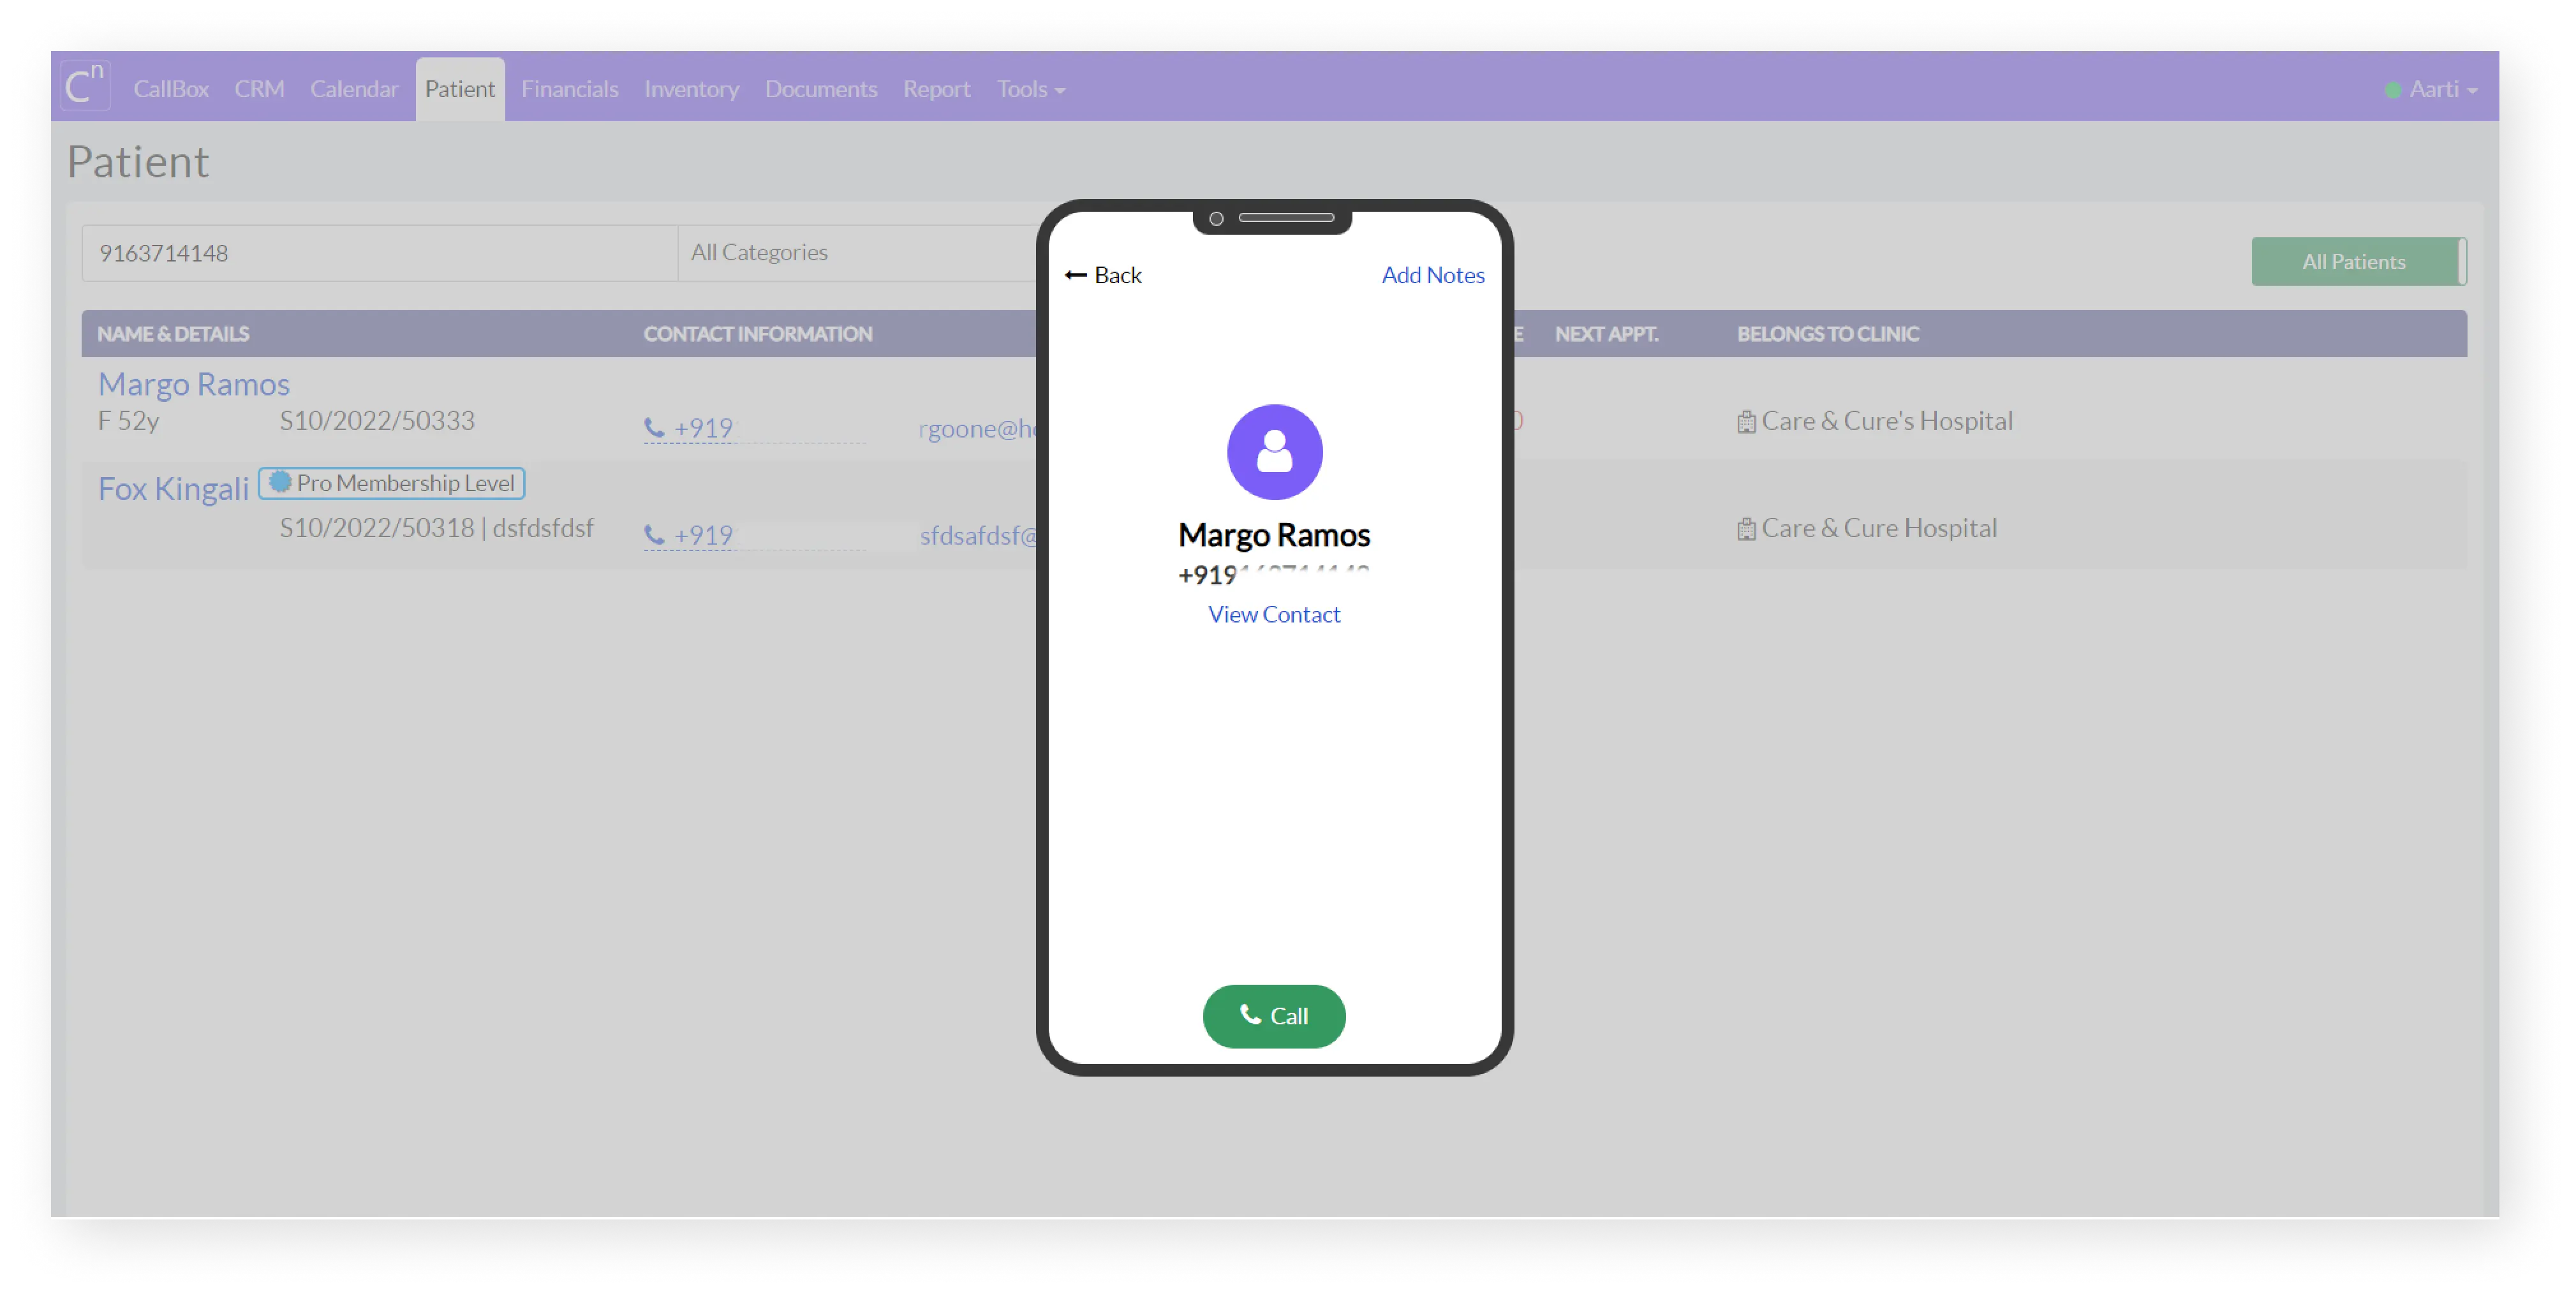
c. To Call any user, you need to click on the phone number. This will pop up the softphone. You need to click on Call to start a Call.
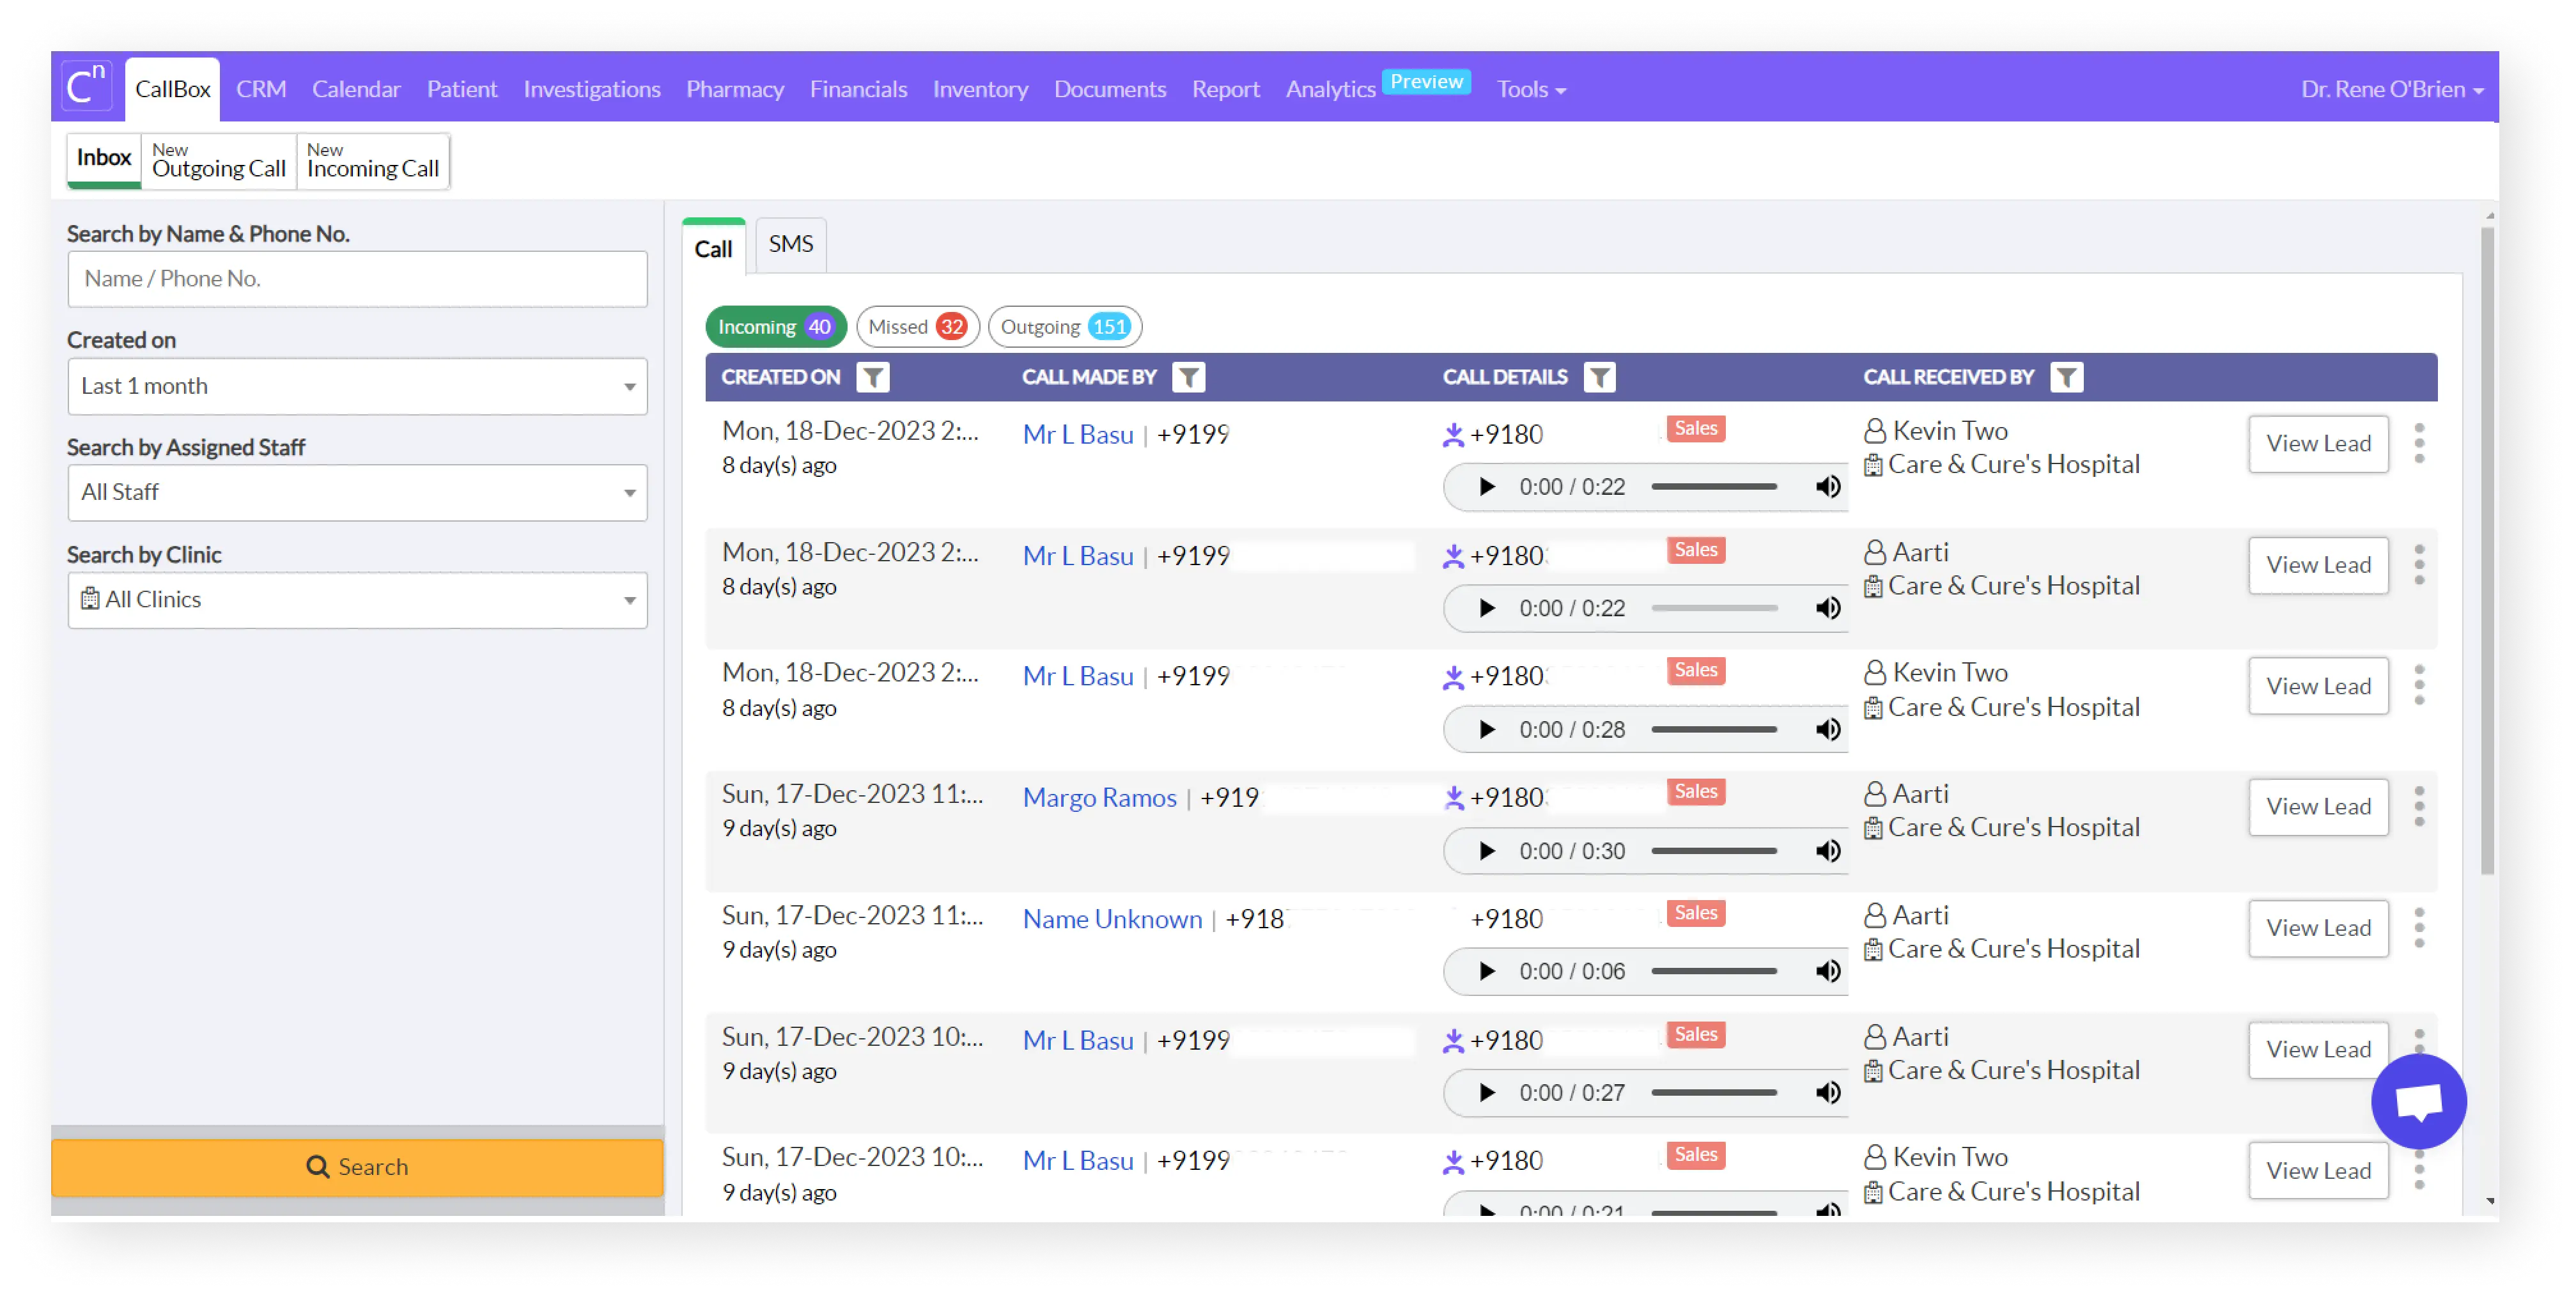
d. To view call records, you need to go to CallBox -> Inbox. All call recordings will be available here. There are filters based on which you can customize your search criteria.
Get Your Virtual Business Phone System
Never Miss A Business Call